(Press sample)
Hello!
One of the first items that introduced me to UberChic Beauty was their amazing Uber Mat--it changed the way I do nail art, has saved my furniture, and possibly saved my marriage. So I was super excited when they came out with a smaller version designed with decal-making in mind.
I made a video to demonstrate the products, including a tutorial on how to make decals:
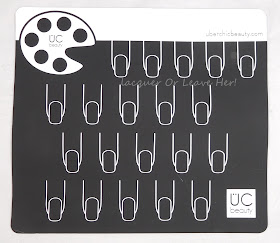
I'm also going to walk you through all of it here. The mini mats are made out of the same material as the larger Uber Mat, so they're resistant to nail polish and acetone. They have a bunch of fingertips on them so you can make a slew of decals all at once:
 |
| UberChic Beauty Mini Mat |
There's both a clear/white version and a black version; the white shows darker colors better while the black shows lighter colors together, and can help you see what your stamping will look like over darker colors:
 |
| UberChic Beauty Mini Mat |
They measure 9" X 8"; here it is relative to the big Uber Mat, if you already have that:
 |
| Uber Mat vs. Mini Mat |
Okay, let's take a look at how to make those decals! First, brush a generous layer of topcoat onto the mat. The nail shapes are about the right size for my nails; adjust the space you use based on how big your nail surface is. I've found Zoya's Qtica topcoat is great to work with and long lasting--in the video I test out a decal I made a whopping SIX WEEKS earlier.
 |
| Step 1: Brush on your topcoat. |
 |
| Step 1: Brush on your topcoat. |
 |
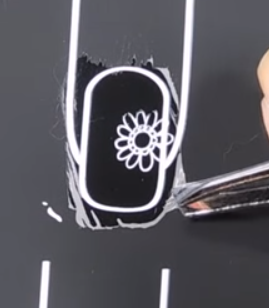
| Step 2: Stamp and decorate your images. |
Also, if there's any decoration you want to do (filling in the design, etc.) now's the time to do it.
Once all your decoration is dry (again, touch gently to test once it looks dry), peel up the decal gently; you can do this with an orange stick, your tweezers, or if you're impatient like me and you don't mind ripping half of them, your fingers:
 |
| Step 3: Peel up your decal. |
 |
| Step 3: Peel up your decal. |
 |
| Step 3: Peel up your decal. |
 |
| Step 3: Peel up your decal. |
Take a moment to admire your decal: Oooo, aaaaahhhh!
 |
| Pause to reflect on how awesome your decal is... |
Don't worry that it's white; it will turn clear again once you put it on the nail.
Now you're gonna want to trim off any excess:
 |
| Step 4: Trim off the excess. |
Put a layer of topcoat on your nail (over whatever polish you have), and wait for it to dry just until it's tacky:
 |
| Step 5: Put on a layer of topcoat |
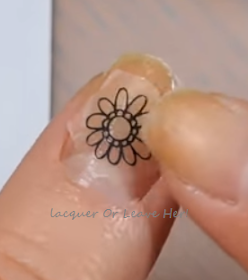
Once it's tacky, place your decal onto the nail, and gently pat it down if needed:
 |
| Step 6: Place onto nail and pat down as needed |
 |
| Step 6: Place onto nail and pat down as needed |
Finally, cover with another coat of topcoat, and you're done!
 |
| Step 7: Cover with a final coat of topcoat |
 |
| Step 7: Cover with a final coat of topcoat |
I mentioned that in the video I tested a decal I made six weeks before; here's how it came out (I made this using UberChic Beauty's Out Of Africa plate):
How cool is that! Here are my tips for making decals ahead of time for future use:
- Use the right topcoat. Not all topcoats will last. I used Zoya's Qtica topcoat.
- I stored my decals in a Ziploc bag.
- I found that if I stacked my decals on top of each other, they stuck together and were hard to pull apart. So put them next to each other in the Ziploc bag, not on top of each other.
- Store flat.
I don't know about you, but this is a really great option for me. I'm hard on my nails and rarely can make a manicure last for a full week, so when I go on vacation, this is a really convenient way to keep my nails looking cute.
I love these mini mats--they allow me to make decals while I'm painting my nails or doing other things because I can make a bunch on the little mat and set it off to the side. I also love the little palette thing in the upper corner--such a cute way to put your polish out for use while you're decorating your decals. And if you're not one of the lucky ladies who have a dedicated nail space (I'm not and I'm jealous, lol), the mini mat will help you out if you need to work in a smaller space.
You can find these mats and tons of other cuteness on UberChic Beauty's shop, and you can follow them on Facebook for news and updates.
Happy decaling!
M.

Great tip about doing the decals in advance and taking them with you on your vacation! We'll do that - thanks!
ReplyDeleteMake sure you test your topcoat first to make sure it lasts! :) <3
DeleteTests ongoing - I made one test decal :)
DeleteNeed some great ones prepared in advance for my foreign trip next week, so I will tell next month how it worked.
Great idea and a wonderful review! Always get good ideas from you ;-) so thanks.
ReplyDeleteThank you, my friend! It always makes my day to get a hi from you! Let me know if you try this out. :) :) <3 <3 <3
DeleteGreat review on both of these mini mats. They seem to work really well and its great for someone with limited space to use them on.
ReplyDeleteAbsolutely. They come up with some great stuff!
DeleteAwesome review and tutorial! I'm still working on making my own decals, and definitely plan on storing them!
ReplyDeleteGreat write up!! I picked up the black mini mat when it launched, and have never regretted it - I use it more than the bigger one!
ReplyDeleteI have the mini white mat and really want the black one because the more contrast I can give myself the better. This post was amazingly helpful because I'm still learning to stamp so if I do a decal I like I now know how to save it for the future. Thank you heaps for doing this post. <3
ReplyDeleteI love my uber mat, I love that she is making a black version of the small one! Awesome review!
ReplyDeleteI love making decals. It works better with my shaky hands than regular nail art.
ReplyDeleteGreat review! I must admit Im "old school" and still prefer my stampers for decals, but I do love the mats for testing colors, testing opacity, or generally just making a mess. :)
ReplyDeleteGreat review!!
ReplyDeleteGreat review/post! Thank you!
ReplyDeleteGreat review, and thank you for the tutorial!
ReplyDeleteI had to pick up the mini mat after getting the bigger one for Christmas. It's so perfect for video recording!
ReplyDelete