Showing posts with label stamping sandwich. Show all posts

Sunday, November 6, 2016

Review: Ejiubas double-sided Celtic plate!

(Press samples ahead!)

Hello!


Okay, guys. If you haven't checked out Ejiubas stamping plates yet, I am deeply excited to be the first to introduce them to you because, two words (one hyphenated word?): Double-Sided.


Yes, of course I love the designs, and yes, of course I wouldn't be excited if it didn't stamp well. But it does. And: DOUBLE-SIDED. Why didn't someone do this before??


Ejiubas Celtic double-sided plate


Okay, I'm getting ahead of myself. First, here's the full video review I made of the plate (I also did a super-quick version, which you can find here):


Okay, let's take a look at the plate:


I love that one side of the plate is collage-style and one side is traditional full nail images, to give you the best of both worlds, and to maximize the design potential you get from mixing and matching. And while I love the predominant Celtic flavor of the plate, I also love the art nouveau influence that makes this an amazing plate for so much more than just Celtic designs.


So how big are we talking? The full nail images are 5/8ths of an inch wide and 6.5/8ths of an inch tall:


And here's a shot to give you a feel for how big things are on the collage portion:


Yeah, okay, but...does it stamp well??


Those are some darn good images. The one thing to be careful about is the bird section of the plate--whenever you have big, wide spaces like that, you need to be careful about the direction you swipe, o you won't get bald areas. I try to go diagonal to the main lines. :)


On to the sample manicure! I'm still loving fall colors, although I'm starting to feel the pull of winter jewel-tones...but for now I wanted to do some fall layering with this plate, so I pulled out Spellbound Nails Crookshanks, an excellent polish for pond manis and stamping sammiches. Then I stamped between layers and on top of the layers with Girly Bits stamping polishes in Bronze Goddess and Flame:


Ejiubas Celtic over Spellbound Nails Crookshanks, stamped with Girly Bits Bronze Goddess and Flame

Ejiubas Celtic over Spellbound Nails Crookshanks, stamped with Girly Bits Bronze Goddess and Flame

Ejiubas Celtic over Spellbound Nails Crookshanks, stamped with Girly Bits Bronze Goddess and Flame

 I am sooo happy with how this came out, I think I'm gonna recreate it and wear it on Thanksgiving. I love how you can see the layered swirls and the flakies in the polish, and I love how these two colors of stamping polish play together. If pumpkin spice were a manicure, this is the manicure it'd be. :)


You can find Ejiubas plates on their website, and also on Amazon if that's easier for you. And don't forget to follow them on Facebook and Instagram for inspiration and updates!

Happy Stamping!
M.

Thursday, August 25, 2016

NOTD: Flitting butterflies, featuring butterfly charms from Charlie's Nail Art

(Press samples and affiliate links ahead!)

Hello!


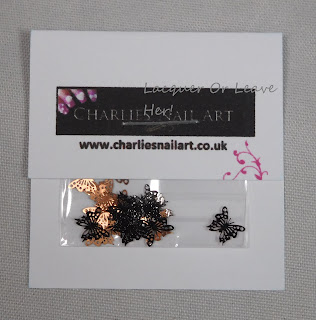
Charlie's Nail Art recently sent me these adorable little butterfly charms to review:


Charlie's Nail Art Butterfly Charms


I like a good nail charm now and then, and I quickly fell in love with these. Unlike many charms, they're extremely flexible, which means I can bend them to fit my nails no problem, or leave them at angles for artistic purposes. I was also surprised to discover they're reversible--they're black on one side and gold on the other, so you can choose which color you want without worrying about running out. I also love how intricate these butterflies are!


For my test mani, I wanted to create the look of a butterfly flitting aroud a flower. To create the effect, I did a stamping sandwich with Spellbound Nails The Knight Bus; in between layers I stamped a butterfly from UberChic Beauty 9-02:


I stamped with Messy Mansion Chalk and Lilac. On top, I stamped a poppy from the same plate with Messy Mansion Hydrangea Blue and Blue You A Kiss. Then I added my charms on the top. Here's how it came out:


Flutterby with Charlie's Nail Art charms and Spellbound Nails The Knight Bus

Flutterby with Charlie's Nail Art charms and Spellbound Nails The Knight Bus


What do you think? I'm not sure I quite captured the look I was going for, but I like the end result. One tip for you--I am generous with topcoat when I attach charms like these, but I wasn't careful when I applied it, so I smudged the stamping on the flower a bit. So be careful! Ultimately, this ended up a little busier than I intended, but I still like it--it's light and flirty and perfect for the last days of summer. And believe it or not, the butterflies stayed put until I removed them!


You can find the charms at Charlie's Nail Art, and you can get 10% off your entire order using my code: LOLAM10. You can also follow them on Instagram for inspiration!


Happy nail art,
M.

Tuesday, April 19, 2016

NOTD: Thermal Gradient with Mid West Lacquer Solstice and Messy Mansion's Symetrika 02

(Press samples and affiliate links ahead!)

Hello!

Okay, so. I was playing around with some nail art, and discovered a couple of things. First of all, I discovered that thermal polishes can make quick-and-clean gradient looks when you stamp over them. Second, I learned how not to do a stamping sandwich accent nail.


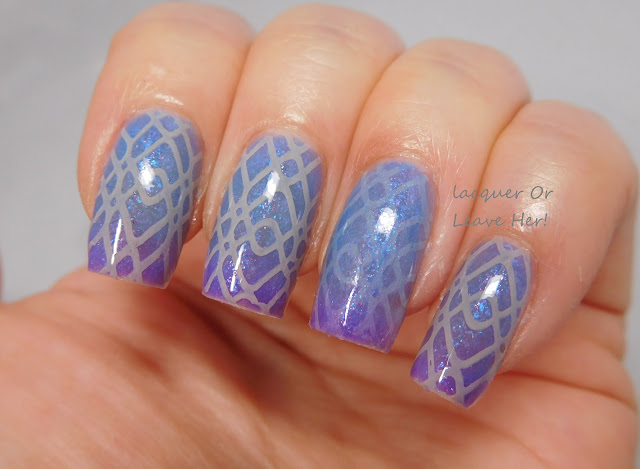
Let's take a look at what I mean. I started with Mid West Lacquer Solstice, a thermal polish that looks purple with blue flecks in the bottle, but when on is predominantly periwinkle with gorgeous blue flakie flecks where your fingers are warm. After one coat, I stamped on the accent nail with Messy Mansion's Symetrika 02, using Sally Hansen Sand Storm:


Messy Mansion's Symetrika 02


Then I finished my polishing, and stamped over the top of the rest of the fingers with the same image:


Mid West Lacquer Solstice + Messy Mansion Symetrika 02
Mid West Lacquer Solstice + Messy Mansion Symetrika 02

Mid West Lacquer Solstice + Messy Mansion Symetrika 02
Mid West Lacquer Solstice + Messy Mansion Symetrika 02


So, I LOVE the way that the thermal polish makes it look like I took forever doing a messy gradient manicure--very cool effect in nothing flat.

However, in my mind, I thought that having the accent nail stamped on a lower level of polish than the other nails would look cool, it sort of looks like I just messed up somehow, forgot a nail or something. Or maybe I'm just my own worst critic, I don't know. I do know that I love the way Sand Storm stamped over these colors to give a more subtle effect than standard stark white.

Hope you're having a great day, and happy stamping!
M.

Sunday, April 10, 2016

Before & After: Spellbound Nails Late Bloomer + UberChic Beauty 6-03 (or, soft sammich)

(Press sample)

Hello!

I love a good stamping sandwich, and the recent spring collection from Spellbound Nails just calls out for them!

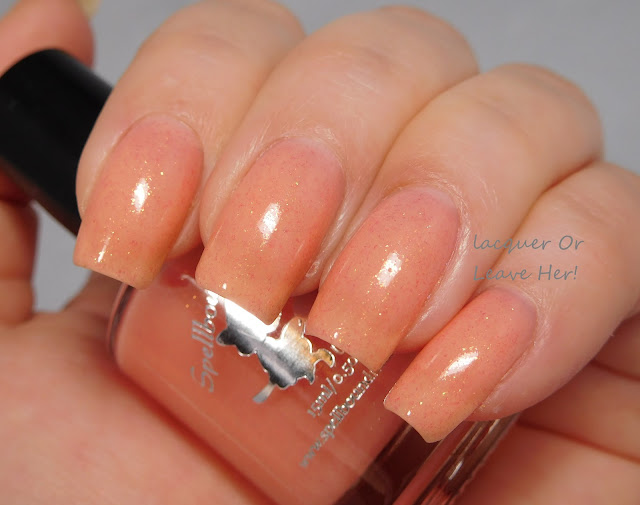
For this one I started with Spellbound Nails Late Bloomer, a soft orange jelly with gold flecklets:

Spellbound Nails Late Bloomer


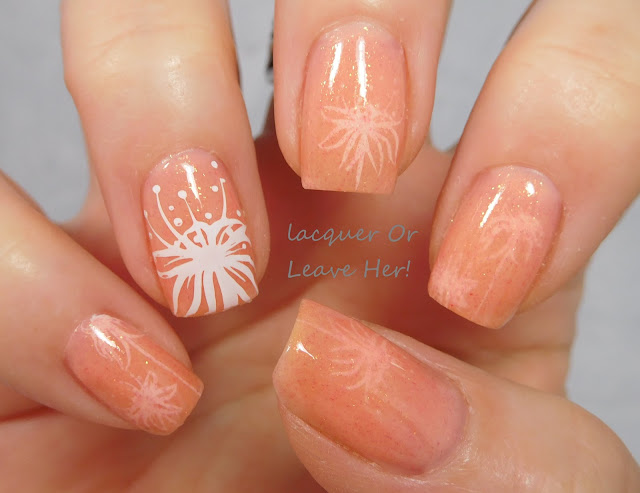
As I put on layers of luscious squishy jelly, I stamped with the dandelion-like images from UberChic Beauty 6-03 with Barry M Cotton:


UberChic Beauty 6-03


I alternated the images so that the smallest were on the index and pinky, and were under the most layers of polish; I put the biggest flower on my ring and thumb on the very top of the polish, and the middle-sized flower under one coat of polish on my middle finger. Here's how it turned out:


Spellbound Nails Late Bloomer + UberChic Beauty 6-03

Spellbound Nails Late Bloomer + UberChic Beauty 6-03
Spellbound Nails Late Bloomer UberChic Beauty 6-03

Spellbound Nails Late Bloomer + UberChic Beauty 6-03
Spellbound Nails Late Bloomer UberChic Beauty 6-03


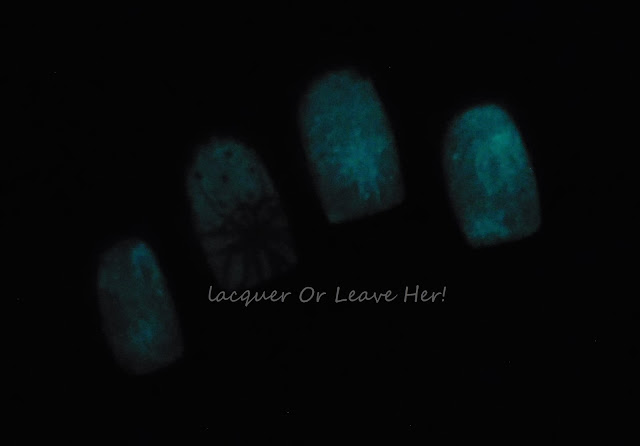
And check this out! Late Bloomer is a glow-in-the-dark polish--look at how this mani looked in the dark:


Spellbound Nails Late Bloomer + UberChic Beauty 6-03
Spellbound Nails Late Bloomer UberChic Beauty 6-03

How cool is that?!?!?!

I love this mani--there's something so wispy and feminine about it. What about you, are you a fan of stamping sammiches?

Happy stamping,
M.

Saturday, September 26, 2015

NOTD: Haunted Puniken Patch (Shinespark Jack O'Lantern + UberChic Beauty Halloween 01)

(Press sample)

Hello!

The moment I set eyes on the awesome orange juicy-ness that is Shinespark Jack O'Lantern, I knew I wanted to do a stamping sandwich with it--and that I wanted it to be Halloween themed. Yes, I know this is early to be showing you Halloween manis, but I promised when I reviewed UberChic Beauty Halloween 01 that I'd show you a mani using the plate soon. So here we go!

Here's another look at the plate:

UberChic Beauty Halloween 01


Before I applied my first coat of polish, I stamped a couple of little jack-o-lanterns and the scaredy cat from the plate, using Barry M Cotton (an awesome stamping polish, btw). I applied one coat of polish, and strategically placed my glitters. Then I stamped a few more punikens, and applied a second generous coat. Here's how it turned out:


Spooky pumpkin patch manicure

Spooky pumpkin patch manicure


Boy, that cat looks pretty darn scared...The jack-o-lanterns are spooky, but not that spooky--what can he be so scared of? Let's pull back and see:


Spooky pumpkin patch manicure

Spooky pumpkin patch thumb


OMG! It's a ghostie and it's coming right toward him! No wonder he's so scared!!!

Ahem. But seriously. Can I say how much I love the stamping sandwich effect? It always looks better in person than in pictures, but it adds so much dimension, really makes it look like some of the punikens are farther in the background. I love this--such a fun, playful look for the season.

Happy stamping!
M.