Saturday, December 31, 2016

Review: Messy Mansion Christmas Collection Stamping Polishes!

(Press samples ahead!)

Hello!


Messy Mansion has released a new set of stamping polishes, the Christmas Collection, a set of autumn/winter colors! Their previous polishes, which I ADORE, have all been cremes, so I'm super excited that there are four metallics in this collection. And, the previous polishes were brights and pastels, so these jewel-tones round out their offerings very nicely:


Messy Mansion's Christmas Collection stamping polishes: Gingerbread, Pudding, Holly, Jingle Bells, Ivy, and Spruce
Messy Mansion's Christmas Collection stamping polishes: Gingerbread, Pudding, Holly, Jingle Bells, Ivy, and Spruce 


Messy Mansion's Christmas Collection stamping polishes: Gingerbread, Pudding, Holly, Jingle Bells, Ivy, and Spruce
Messy Mansion's Christmas Collection stamping polishes: Gingerbread, Pudding, Holly, Jingle Bells, Ivy, and Spruce 


From left to right, these polishes are:


Gingerbread: a metallic burnt orange-brown
Pudding: A creme chocolate
Holly: A metallic cranberry red
Jingle Bells: A bronze-ish metallic gold with an antiqued feel
Ivy: a metallic forest green
Spruce: a creme slate blue


I did a video to test them out over both black and white, and to see how they held up when I applied topcoat:


How did they stack up? They all stamped beautifully, with great detail in both fine and large areas, as you can see before. The formula was excellent on all of them, except my bottle of Jingle Bells was a little thick--it still stamped well and didn't smear, but I thinned it a little for future use.


Gingerbread and Jingle Bells pop the most over black; Holly shows up almost as well. Pudding, Ivy, and Spruce are a more muted over black, but are still clearly visible--they don't just disappear into the black the way some polishes do. So the effect will be more subtle, but it's still there.


Messy Mansion's Christmas Collection stamping polishes with topcoat: Pudding, Gingerbread, Holly, Jingle Bells, Ivy, and Spruce
Messy Mansion's Christmas Collection stamping polishes with topcoat: Pudding, Gingerbread, Holly, Jingle Bells, Ivy, and Spruce 

Messy Mansion's Christmas Collection stamping polishes with topcoat: Pudding, Gingerbread, Holly, Jingle Bells, Ivy, and Spruce


As for smearing--these pictures are taken with topcoat, all applied within about 5 minutes of initial swatching, except for Spruce, which was applied immediately after swatching, within about 15 seconds. As you can see, there is no smearing whatsoever.


That said, I always advise with any stamping polish that you wait a couple of minutes before topcoating if you can, and avoid going over the same spot twice. I use three strokes (middle, left, right), trying not to overlap, and if I miss a spot, I wait until what I already applied dries, and then go over it again.


When I was playing around with Lina Nail Art Supplies Born To Sail 01 plate yesterday,

Lina Nail Art Supplies Born To Sail 01


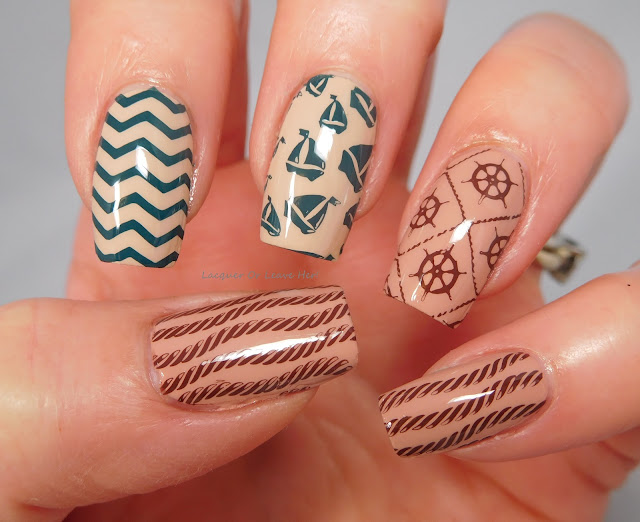
Spruce and Pudding jumped out at me as perfect colors for a nautical manicure. So, I started with a base of Zoya Tatum and Cathy (from the new Naturel (3) collection, stay tuned for my review!), and then stamped my images:


Messy Mansion Spruce and Pudding over Lina Nail Art Supplies Born To Sail 01

Messy Mansion Spruce and Pudding over Lina Nail Art Supplies Born To Sail 01

Seriously, this makes me want to head on down to Cape Cod for the weekend, or the Hamptons even. Of course, this might not be quite the right time, but a girl can dream, can't she?


You can find these polishes on the Messy Mansion website, and you can also follow them on Instagram and Facebook for updates and a ton of inspiration.


Happy stamping!

Friday, December 30, 2016

Review: Lina Nail Art Supplies Born To Sail 01 (plus mani featuring Girly Bits Cosmetics and Messy Mansion polishes!)

(Press samples and affiliate links ahead!)

Hello!


Today we're gonna take a look at another plate from Lina Nail Art Supplies: this time their Born To Sail 01 plate. Here's the video review I did:


And let's take a closer look at the plate:


Lina Nail Art Supplies Born To Sail 01


One of the things I love about this brand is how easy it is to mix and match the images. Notice there are several that all have, for example, the captain's wheel--they're all slightly different so you can get different looks if you want to use them alone, but they work perfectly together, too. I also love the little touches, like the bubbles in among the wavy lines on the image second row from the bottom. And you know I love me some skull and crossbones!


The images are 1.7 x 2.2 cm:


And how do they stamp? Check on the quality:


These were stamped with a clear XL stamper--amazing fine lines and detail.


For my sample mani, I decided to go a different way than the typical nautical manicure (although if you want to see me do one of those with this plate, tune in tomorrow). I started with a base of Girly Bits Just The Tip, That's How You Get Ants, and Lanaaaaaa! (from her Codename: Duchess collection, stay tuned also for my review of that!), and then stamped with Messy Mansion Chalk:

Lina Nail Art Supplies Born To Sail 01 over Girly Bits Cosmetics Codename: Duchess polishes

Lina Nail Art Supplies Born To Sail 01 over Girly Bits Cosmetics Codename: Duchess polishes

What do you think? Soft and girly, and it makes me long for summer trips to the beach. :)


Here's where you can find Lina Nail Art Supplies, and this plate, currently on sale for $14.99:


Happy stamping!
M.

Thursday, December 29, 2016

Two New Year's Eve NOTDs featuring Incoco's Winter Magic Collection

(Press samples ahead!) 

Hello!


Yep, 2016 is almost over, and I'm going to be honest--I'm not sorry to see this one go. It hasn't been a bad year on a personal level, but on other levels, just WOW. So I'm more than happy to ring in 2017!


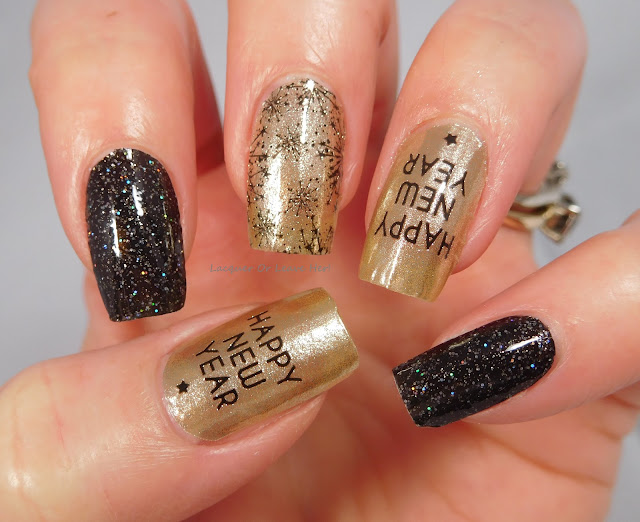
For these looks, I grabbed Incoco's Winter Magic collection's New Year's Cheer, a gold-and-black set with fireworks and the words 'Happy New Year', and Party Time, a black glitter with multi-color scattered holo glitter. I had two ideas for how I wanted to use these, so I decided to make them both.


For the first look, I wanted to have something that literally said Happy New Year, so I cut down those wraps for the nails I wanted to use them with, and created a skittle:

Incoco New Year's Cheer and Party Time

Incoco New Year's Cheer and Party Time

I love the little splash of fireworks, and the glint of colors from the glitter on this.


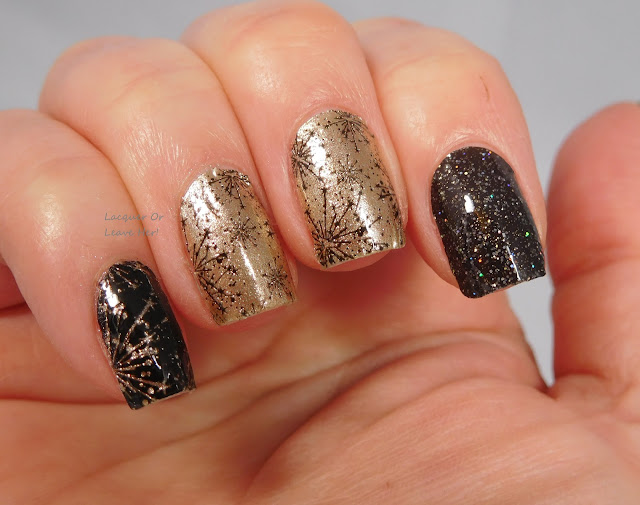
If having the words themselves on your nails doesn't appeal to you, I did a second look that focused on the fireworks:


Incoco New Year's Cheer and Party Time

Incoco New Year's Cheer and Party Time

What do you think? Do you like one more than the other? I like the words for New Year's Eve night, but I think I like the other manicure to wear for other celebrations. No matter what, I love that black glitter soooo much.


Here's a quick tip: if you do what I've done here and mix up two sets of wraps, or just want to use one or two for accent nails, I've found I can keep the left over wraps for a few weeks if I put them back in the package and tape it up really well. They might not be quite as flexible, but they'll still be workable, and that way you can get full value out of your sets.


You can find Incoco Appliques in their shop; you can also find them at Ulta.com, Walmart.com, and Target.com. And don't forget to follow them on Facebook and Instagram!


Happy wrapping,
M.


Tuesday, December 27, 2016

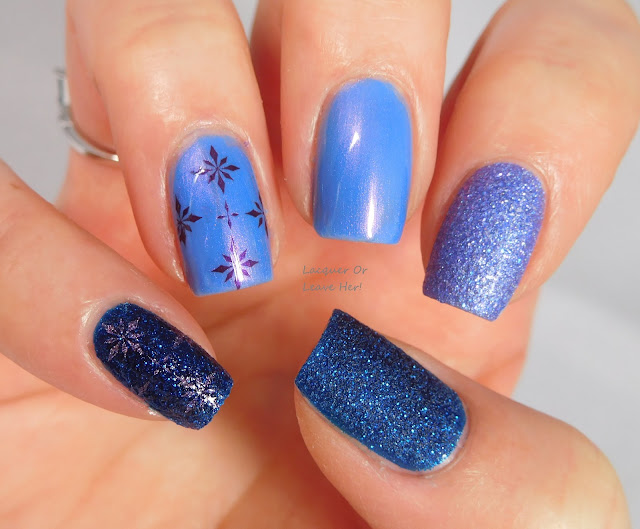
Before & After: UberChic Beauty 13-01 + Spellbound Nails Let It Snow

(Press samples and affiliate links ahead)

Hello!


Just a quick before and after to get you into the wintery snow sort of spirit! It's cold here in Northern California and I know snowstorms are descending on the east coast. Bundle up!


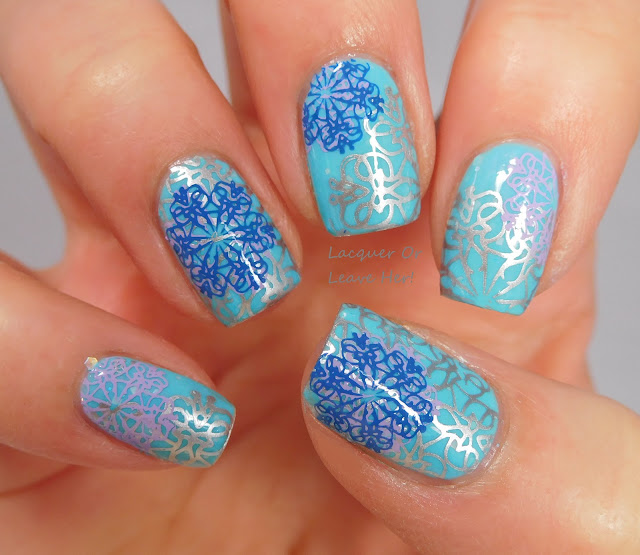
For today's manicure, I started with a base of Spellbound Nails Let It Snow:


Spellbound Nails Let It Snow

Then I stamped some snowwith UberChic Beauty plate 13-01:


UberChic Beauty 13-01

I stamped with Messy Mansion stamping polishes in Sterling, Lilac, and Blue You A Kiss (also available on Amazon if it's easier):


UberChic Beauty 13-01 over Spellbound Nails Let It Snow, stamped with Messy Mansion polishes

UberChic Beauty 13-01 over Spellbound Nails Let It Snow, stamped with Messy Mansion polishes


What do you think? I love the combination of blues and purples, with the silver to give it an extra punch of iciness. And I love how intricate and lacy these images are!


You can find the plate as part of collection 13 in UberChic Beauty's store, and you can follow them on Facebook and Instagram.


Happy stamping,
M.

Sunday, December 25, 2016

Before & After: O Christmas Tree

(Press samples ahead!)

Hello!


Merry Christmas if you celebrate it! And if you don't, I hope you're having a wonderful holiday season filled with family and joy surrounding whatever holidays you celebrate.


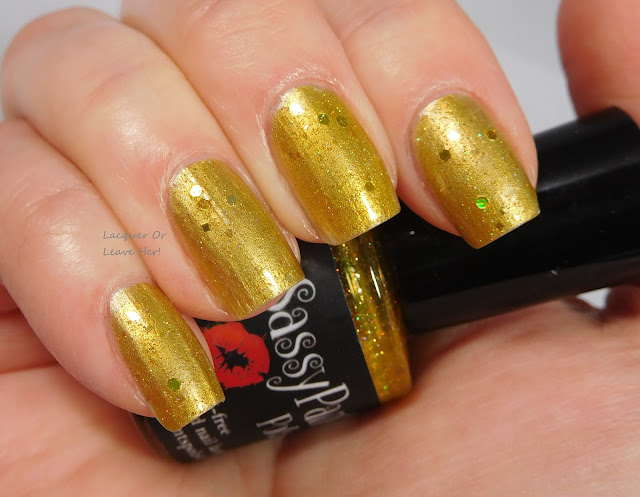
Today I have a quick before and after for you to celebrate the day. I started with a base of Sassy Pants Polish Luster Of Midday over Barry M Gold Foil:


Sassy Pants Polish Luster Of Midday over Barry M Gold Foil


Then I stamped the stick tree image from Messy Mansion plate MM82XL, using Messy Mansion Forest:


Messy Mansion MM82XL


 Finally, I applied a Christmas Tree nail charm from Born Pretty Store:


Born Pretty Store charm + Messy Mansion MM82XL over Sassy Pants Luster Of Midday (over Barry M Gold Foil)
Born Pretty Store charm + Messy Mansion MM82XL over Sassy Pants Luster Of Midday (over Barry M Gold Foil)

Born Pretty Store charm + Messy Mansion MM82XL over Sassy Pants Luster Of Midday (over Barry M Gold Foil)
Born Pretty Store charm + Messy Mansion MM82XL over Sassy Pants Luster Of Midday (over Barry M Gold Foil)


What do you think? I love this look, I think it has a serene feel to it. I also really love the nail charm, how it has the rhinestones in it, and the edges are rounded to it's not as likely to catch and pull on things. That said, there are two things to note about the charm. One, it sits fairly high up from the nail, so I'd suggest attaching it with nail glue (I sometimes attach smaller rhinestones and such with topcoat, but that's not gonna hold here). Also, despite the somewhat rounded edges, the star on the top of the tree will still catch on things if you're not careful--for example, if you're wearing tights, definitely take care this is covered, or apply it after you've dressed for your holiday event. That said, for a special occasion, I think this is a cool look without too much fuss.


You can find the charms on Born Pretty Store's site, and you can use my code for 10% off your order: MCL91. And don't forget to follow them on Facebook and Instagram!


Merry Christmas,
M.

Saturday, December 24, 2016

Review: Born Pretty Store plates BPL-031 & BP-L057 (or, The Nightmare Before Christmas The Day Before Christmas)

(Press samples ahead!)

Hello!


Okay, see, what had happened was? Back at the end of August, I agreed to review two Halloween plates from Born Pretty Store. However, the package got lost in the mail, and only just showed up on my doorstep.


So, what's a girl to do when she needs to review Halloween plates right before Christmas? I mean, I admit, for me, I can wear a scary, spooky, gothed-out mani any time of year. But not everyone is quite as strange as I am. So how do I come up with something from a Halloween plate that's fit for the day before Christmas?


A Nightmare Before Christmas manicure, of course.


Here's a video review I did of the two plates:


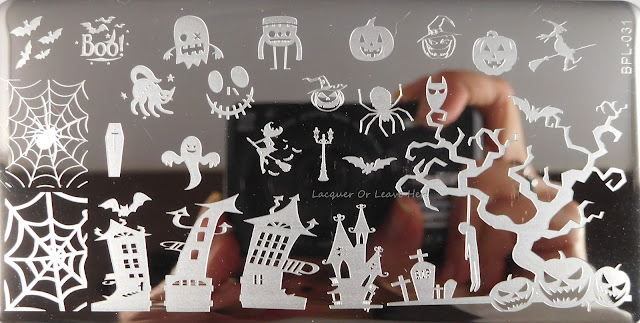
And here's a look at the plates, first BPL-031: 

Born Pretty Store BPL-031


What I love about this plate: The little ghost guy with the X eye is super-fun, the corpse hanging from the tree is very creepy, the sexy witch is awesome, and the swaying houses are unlike any others I've seen.


Here's a look at the relative sizes of the images:


And here's a look at how they stamp: 


Then we have BP-L057:


Born Pretty Store BP-L057


What I love about this plate: OMG, those skeleton kitties are the most awesome Halloween thing ever!! I also love the little funky skeletons, and the lace-snowflake image with the skulls is sooo unique. And another sexy witch--very cool.


Here's a look at size (the full-nail images are 5.5/8 of an inch x 7/8 of an inch):


And a look at how they stamp:


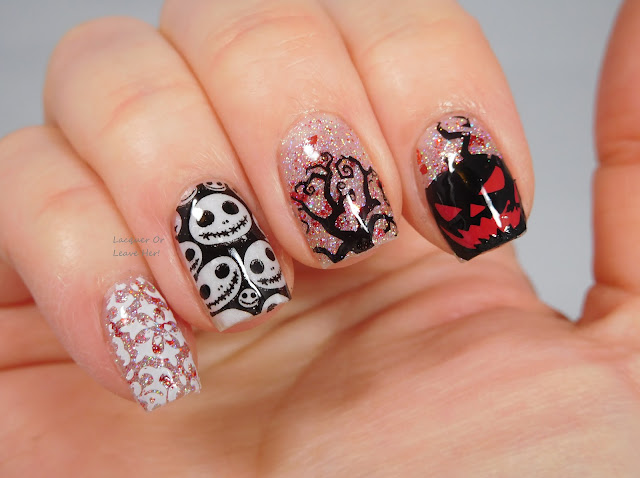
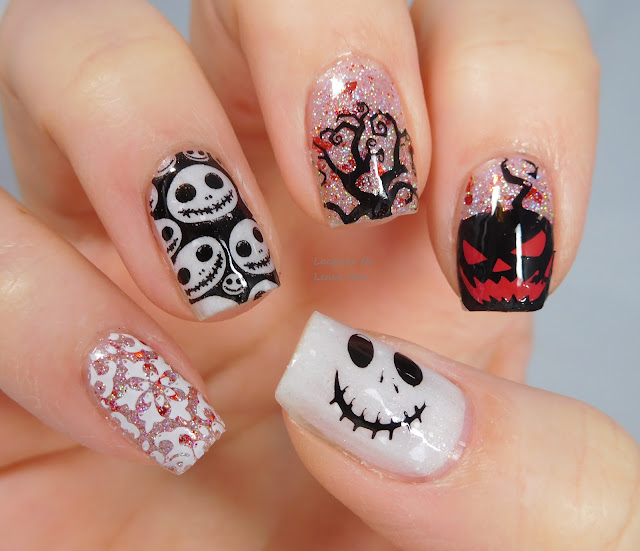
 For my sample mani, I was inspired by the moment in The Nightmare Before Christmas when Jack Skeleton sees the snowflake--the inciting incident of the movie. To capture Christmas colors, I started with a base of Sassy Pants Polish New Fallen Snow and Nose Like A Cherry. Then I stamped my images using Messy Mansion Carbon, Chalk, and Red-y Or Not (used to make a decal with the jack-o-lantern):


Born Pretty Store BPL-031 & BP-L057 over Sassy Pants polishes and stamped with Messy Mansion polishes

Born Pretty Store BPL-031 & BP-L057 over Sassy Pants polishes and stamped with Messy Mansion polishes


So there you have it! My Nightmare Before Christmas manicure, made for the day before Christmas! If you're in the mood for something a little different than traditional Christmas manicures, this should take care of that for you! I love how this came out--a little bit scary, a little bit Christmassy, just like the movie.


You can find these plates in the Born Pretty Store website, and you can use my code for 10% off your order: MCL91.


You can also follow Born Pretty Store on Facebook and Instagram for news, sales, and tons of inspiration.


Merry Christmas Eve!
M.

Friday, December 23, 2016

Before & After: Presents, presents, presents! (featuring Sassy Pants Polish & Charlie's Nail Art)

(Press samples ahead!)

Hello!


Okay, so. See, what had happened was? Well...let's just say this one might have gotten away from me.


When I received a set of little fimo presents to review from Charlie's Nail Art, I figured Christmas was the perfect time to do it, and I figured that the colors would be a refreshing change from typical Christmas colors. So I lined up my plates and my polishes and everything, sang a happy tune, and put it all together.


Fimo presents from Charlie's Nail Art


I started with a base of Sassy Pants Polish Luster Of Midday, from her 'Twas The Night Before Christmas collection:


Sassy Pants Polish Luster Of Midday


Then I stamped it using UberChic Beauty Christmas 02, and Lina Nail Art Supplies Can't Wait For Xmas! plates:


I stamped with Hit The Bottle Polish Aubergine (also available at Beautometry), then I added my fimo presents. Finally, I added some dots with Sally Hansen Mellow Yellow:


Fimo presents from Charlie's Nail Art, UberChic Beauty Christmas 02 and Lina Nail Art Supplies Can't Wait For Xmas! over Sassy Pants Polish Luster Of Midday

Fimo presents from Charlie's Nail Art, UberChic Beauty Christmas 02 and Lina Nail Art Supplies Can't Wait For Xmas! over Sassy Pants Polish Luster Of Midday

What do you think? I can't decide how I feel about it. Every component is super cute, but together I'm not convinced it fully works. Maybe I was just more optimistic about the combination of yellow and purple than I should have been, or maybe I should have put the dots under the top coat of Luster Of Midday. I'm not saying I don't like it--when I make a mani I don't like it doesn't make the blog. I'm just not completely sure about it. I will say I love the sparkle it gives, and the present theme, and the fimo slices are super cute! Just maybe I'd put it all together differently next time.


You can find the fimo slices in Charlie's Nail Art's shop (I think the blue and pink ones in the set would be super cute for a baby shower mani--and for $0.64, how can you go wrong?). Use my code LOLAM10 for 10% off your order. And don't forget to follow them on Facebook and Instagram for updates and tons of inspiration!


Happy stamping,
M.

Thursday, December 22, 2016

Review: Lina Nail Art Supplies 4 Seasons-Winter 01 plate (with sample manis!)

(Press samples and affiliate links ahead!)

Hello!


Today I have another plate from Lina Nail Art Supplies to show you! This time it's their 4 Seasons-Winter 01 plate. Here's the video review I made:


And let's take a closer look:


Lina Nail Art Supplies 4 Seasons - Winter 01


I love that these plates are scaled to make super-easy combinations, and there are so many images that go well together in so many combinations. I'm really into pine-tree manis this year, so the deer and the trees and pine cones and fronds all call out to me. And, here are plenty of smaller images to mix-and-match.


The full-nail images are 1.7 cm x 2.2 cm, and here's a look in inches:


And the stamping quality is excellent:


 During my recent polish reviews, I did some accent nails with this plate, in case you missed them:


Lina Nail Art Supplies 4 Seasons - Winter 01 over Sassy Pants Polish Not Even A Mouse
Lina Nail Art Supplies 4 Seasons - Winter 01 over Sassy Pants Polish Not Even A Mouse, stamped with Hit The Bottle Polish Champagne Shifter

Lina Nail Art Supplies 4 Seasons - Winter 01 over Sassy Pants Polish To All A Good Night, stamped with Girly Bits Cosmetics Silver Bells


For today's sample mani, I wanted to go for something a little different than tranditional Christmas colors, instead, I did a more general holiday-elegance sort of mani. I started with a base of polishes from Zoya's Enchanted holiday 2016 collection, because I am loving how well these go together--I chose Waverly, Saint, and Alice:


Zoya Enchanted holiday 2016 skittle with Waverly, Saint, and Alice

Then I stamped my index and my pinkie with Hit The Bottle Polish Aubergine and Amethyst Sizzle  (also available at Beautometry; stay tuned for my review):


Lina Nail Art Supplies 4 Seasons -Winter 01 over Zoya Waverly, Saint, and Alice

Lina Nail Art Supplies 4 Seasons -Winter 01 over Zoya Waverly, Saint, and Alice


I love the dark and the light blues and purples contrasted with the delicate print. This is a mani I'd wear throughout the year, but I love it for the holiday, the way it throws light and shimmer just feels posh and celebratory.


You can find this plate and many others in Lina Nail Art Supplies' shop; here's all their deets:


Happy stamping!
M.