Friday, July 29, 2016

Before & After: Simple Roses (Zoya Dixie + UberChic Beauty 9-03)

(Press samples and affiliate links ahead!)

Hello!


I got my files back!! I got my files back!! Woo-hooo!!!


Okay, Michelle, focus. Nail art. Nail art. ;-)


One of the things that drew me to nail stamping was the potential to make quick, easy, beautiful nail art. Yes, there is a learning curve as you figure out how to use the tools, although clear stampers have made it much easier to position accurately, etc. But once you have that down, you can make some really pretty looks without too much effort at all. So I want to make sure that now and then I show you 'simple' nail art: beautiful, but relatively quick and easy to do.


For today's manicure I started with a base of Zoya Dixie, a muted cherry-watermelon creme from the Zoya summer 2016 Sunsets collection:


Zoya Dixie
Zoya Dixie


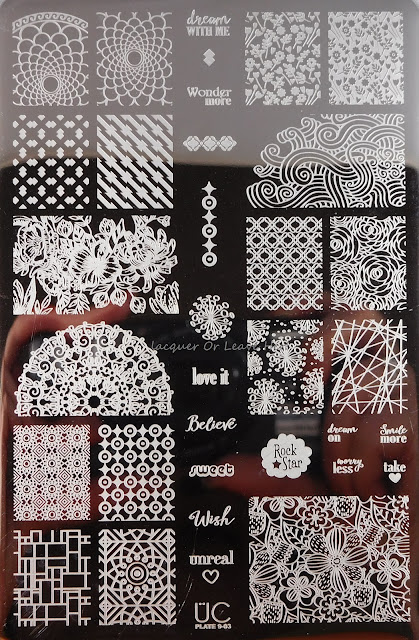
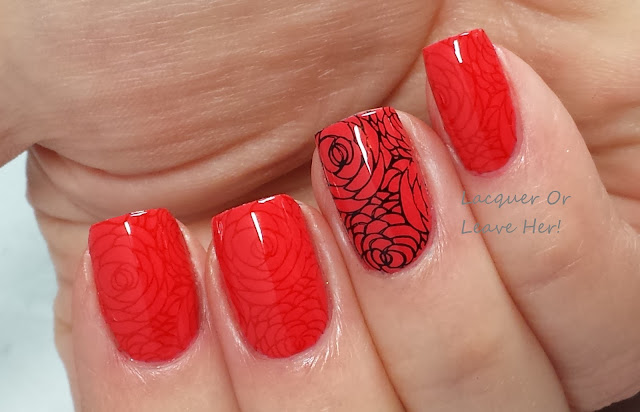
Next I stamped using the cabbage rose (camelia?) image from UberChic Beauty 9-03 with Konad Black on my accent nails (this was before I discovered Messy Mansion Carbon, which is SO MUCH BETTER), and then with Sally Hansen Rapid Red for a subtle red-on-red look:


UberChic Beauty 9-03


Here's how it turned out:


Simple Roses: Zoya Dixie + UberChic Beauty 9-03
Simple Roses: Zoya Dixie + UberChic Beauty 9-03

Simple Roses: Zoya Dixie + UberChic Beauty 9-03
Simple Roses: Zoya Dixie UberChic Beauty 9-03


What do you think? I love the subtle simplicity of this--so pretty, and you can do it in about 5-10 minutes. There's a pop of contrast, but the other nails have just that little bit of something. Of course you can also use the tone-on-tone stamping on all the nails, or the black-on-red on all the nails, or mix and match--but I think this is an elegant balance.


Happy stamping!
M.

Wednesday, July 27, 2016

Before & After: Coffee Klatch (Spellbound Nails Marauder's Map + UberChic Beauty Coffee Addict mini plate)

(Press samples and affiliate links ahead!)

Hello!


How's it going!? I got a little bit of good news today--it looks like at least most of my files are going to be recovered, so yay! ::happy file recovery dance:: So let's celebrate with another one of my favorite things: coffee.


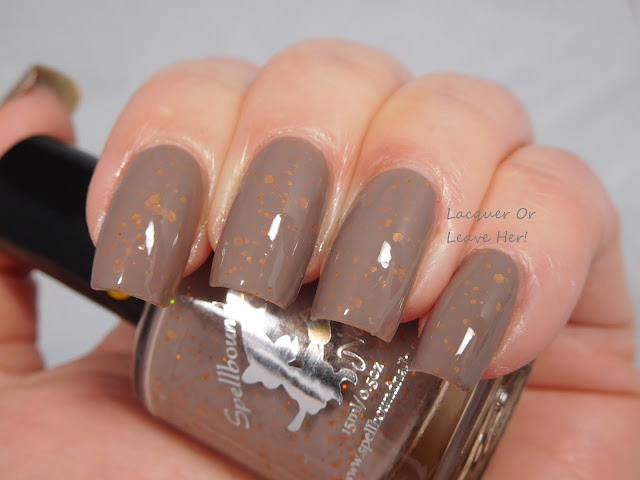
For today's mani I started with a base of Spellbound Nails Marauder's Map, from Ashley's Harry Potter Book 3 collection:


Spellbound Nails Marauder's Map


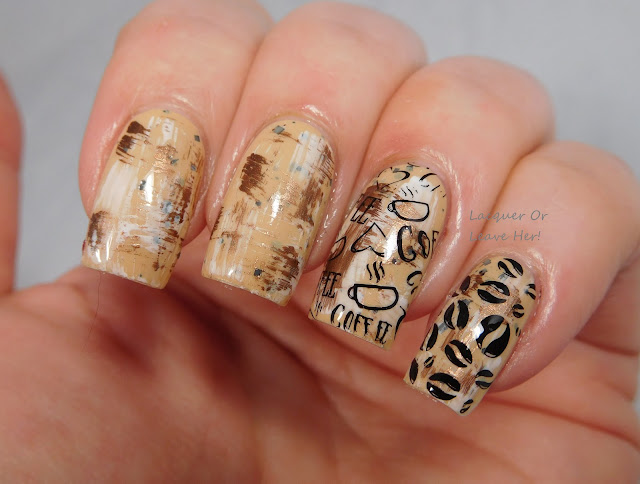
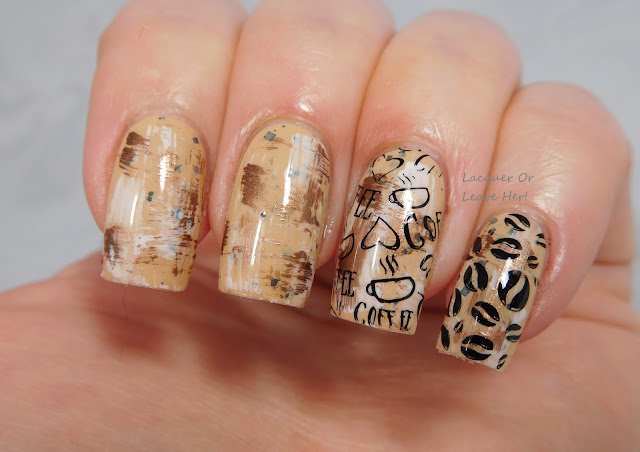
I've been really digging the dry-brush technique lately, so I decided to do that here. I used Spellbound Nails Milky Way and Hit The Bottle Polish Everyday I'm Truffling (you can also find HTB at Beautometry.com) to do a dry-brush cross-hatch pattern on the background, then I stamped my images from UberChic Beauty's Coffee Addict mini plate with Messy Mansion Carbon:


UberChic Beauty's Coffee Addict mini plate


Here's how it came out:


Spellbound Nails Marauder's Map + UberChic Beauty's Coffee Addict mini plate
Spellbound Nails Marauder's Map + UberChic Beauty's Coffee Addict mini plate

Spellbound Nails Marauder's Map + UberChic Beauty's Coffee Addict mini plate
Spellbound Nails Marauder's Map UberChic Beauty's Coffee Addict mini plate

Spellbound Nails Marauder's Map + UberChic Beauty's Coffee Addict mini plate
Spellbound Nails Marauder's Map UberChic Beauty's Coffee Addict mini plate

I love love love how this came out! The dry-brush technique is such an easy way to get good texture and dimension, and these colors are relaxing and chic. I love this almost as much as real coffee...sigh...:)


Happy stamping!
M.

Tuesday, July 26, 2016

Before & After: Safety Dance (Zoya Cam + UberChic Beauty 10-03)

(Press samples and affiliate links ahead!)


Hello!


How's it going? I'm slowly recovering from my hard drive explosion and the discovery that my files weren't backed up in the cloud the way I thought they were...hopefully by the end of the week I'll be back to normal!


For today's before & after, I started with Zoya Cam, one of the polishes in the Zoya Sunsets summer 2016 collection:


Zoya Cam
Zoya Cam


Then I stamped over it with the arrow patterns from UberChic Beauty 10-03:


UberChic Beauty 10-03


I stamped first with Messy Mansion Banana Bender, and then using my clear stamper, I went over the design in a few places with Red-y Or Not:


Zoya Cam + UberChic Beauty 10-03

Zoya Cam + UberChic Beauty 10-03

Zoya Cam + UberChic Beauty 10-03


 What do you think?! I think it's energetic and fun. I love these colors together, especially during the summer--they feel vibrant and full of life.


Wishing you happy stamping and everlasting hard drives,
M.

Sunday, July 24, 2016

Before & After: Smoosh Attack! (UberChic Beauty 10-02 + Spellbound Nails Galaxy Nails Collection)

(Press samples and affiliate links ahead!)

Hello!!


For today's art, I wanted to try something a little different--I've seen some smoosh manis I like, and they seem like a faster way to get a seriotype sort of look, so I figured I needed to try it out.


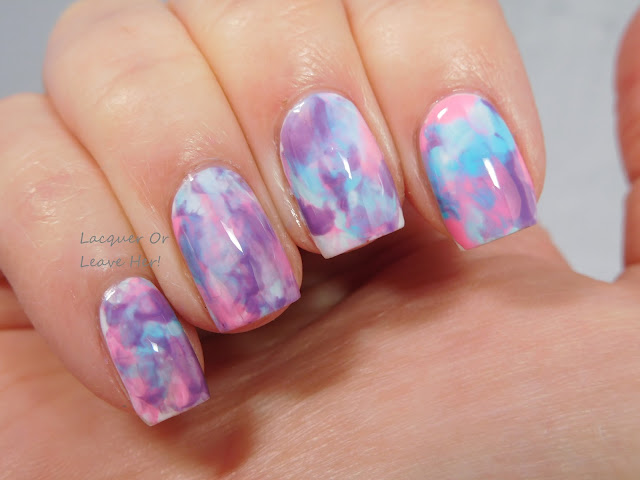
I started with Spellbound Nails Milky Way, a white creme, and dotted on the other colors from her Galaxy Collection onto my stamper, then smooshed the colors on to my white nails. Here's how they came out:


Smoosh mani with Spellbound Nails Galaxy Nails collection

Smoosh mani with Spellbound Nails Galaxy Nails collection
 
Smoosh mani with Spellbound Nails Galaxy Nails collection


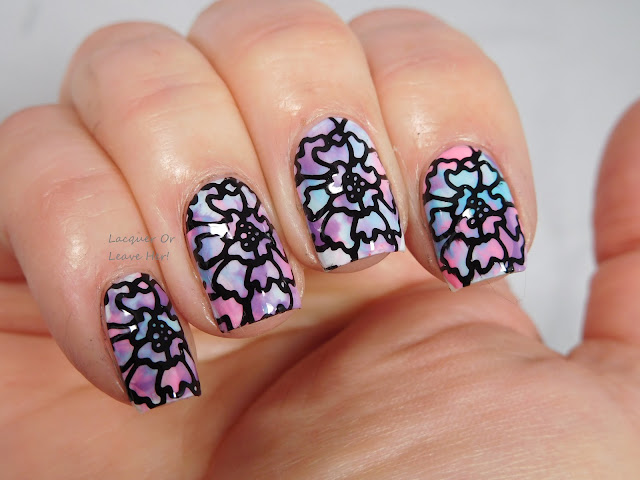
Then I stamped over it with UberChic Beauty plate 10-02, and Messy Mansion Carbon:


UberChic Beauty Plate 10-02


Here's how it came out:


Spellbound Nails Galaxy Collection smoosh mani + UberChic Beauty Plate 10-02
Spellbound Nails Galaxy Collection smoosh mani + UberChic Beauty Plate 10-02

Spellbound Nails Galaxy Collection smoosh mani + UberChic Beauty Plate 10-02
Spellbound Nails Galaxy Collection smoosh mani UberChic Beauty Plate 10-02


What do you think? I love the stained-glass feel to it, and I love the way the colors blend underneath. And the technique is super easy!


Happy stamping,
M.

Friday, July 22, 2016

Review: Messy Mansion Poppy Plate (MM78XL)

(Press samples and affiliate links ahead!)

Hello!

Today I have a very pretty theme plate to show you from Messy Mansion--what I'm calling the 'Poppy' plate, aka MM78XL. Yes, of course I did a video so you could see it up close and personal:


And here's a still image of the plate:


Messy Mansion Poppy Plate (MM78XL)


So many different looks you can create from this! They each work alone, and they all mix-and-match so beautifully. Little poppies. Delicate poppies. Big, bold poppies. Layering poppies! There's a negative space image that will let your gorgeous base polish show through, images for watercolor, lead-lighting, making decals, images that make great backgrounds...and stunning art nouveau pieces to turn your nails into insta-art. So versatile, so much bang for your buck.


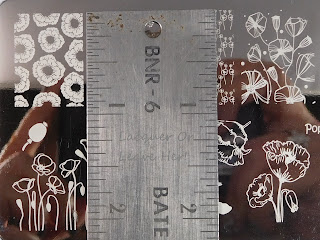
How big are them thar images? Since there are a variety of images, here's a relative look:

Messy Mansion Poppy Plate (MM78XL)

Messy Mansion Poppy Plate (MM78XL)


And how do they stamp? Very well. I accidentally stamped over a textured polish when I did my live test, and it still came out extremely well:


For my sample mani, I started with a base of Spellbound Nails Runaway Rat, from her new Harry Potter Book 3 collection: 


Spellbound Nails Runaway Rat


Then I stamped a subtle gold background with Messy Mansion Soft Gold, and then stamped the growing poppies with Messy Mansion Carbon. I wanted a watercolor type of lead-lighting look, and I wanted red, but I don't have a transparent enough vibrant red, so I made my own by mixing 1 part daniPro First Kiss Red with 3 parts Seche Vite topcoat, and brushed it on for a messy look over the flowers:


Field of poppies: Spellbound Nails Runaway Rat + Messy Mansion MM78XL
Field of poppies: Spellbound Nails Runaway Rat + Messy Mansion MM78XL

Field of poppies: Spellbound Nails Runaway Rat + Messy Mansion MM78XL
Field of poppies: Spellbound Nails Runaway Rat + Messy Mansion MM78XL
 
Field of poppies: Spellbound Nails Runaway Rat + Messy Mansion MM78XL
Field of poppies: Spellbound Nails Runaway Rat + Messy Mansion MM78XL


I love how the gold stamping plays together with the copper glitters to create a rich background, and I love how the watercolor poppies just pop off the nail. So happy with how it came out!


You can find this plate and the stamping polishes in the Messy Mansion shop, and you can follow them on Facebook and Instagram. :)


Happy stamping!
M.

Wednesday, July 20, 2016

Before & After: Porco Deco (featuring MoYou London Steampunk 07 and Literary Lacquers Porco Rosso)

(Press samples and affiliate links ahead!)

Hello!


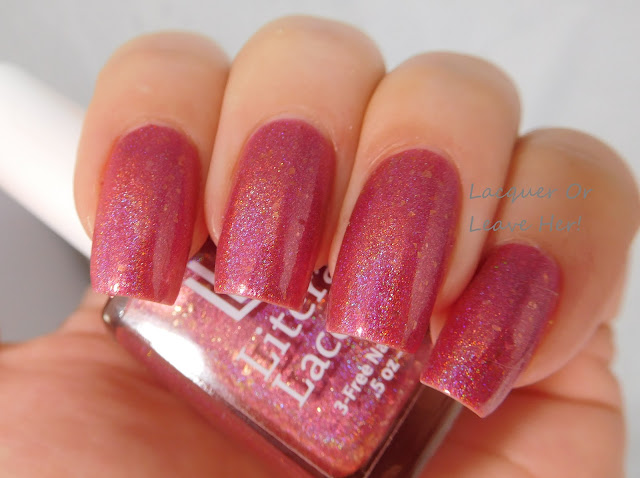
A while back I showed you the delightful flakie-holo goodness that is Literary Lacquers Porco Rosso:


Literary Lacquers Porco Rosso
 
Literary Lacquers Porco Rosso
 

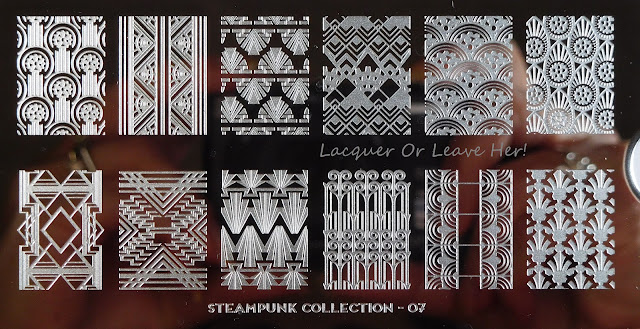
Maybe because the inspiration for the polish (the Hayao Miyazaki film Porco Rosso) is set in the 40s, but I felt a need to do something retro to this polish, so I pulled out MoYou London Steampunk collection 07:


MoYou London Steampunk collection 07


I also did a video review of this plate, if you want to hear more thoughts on it and see a stamping test:


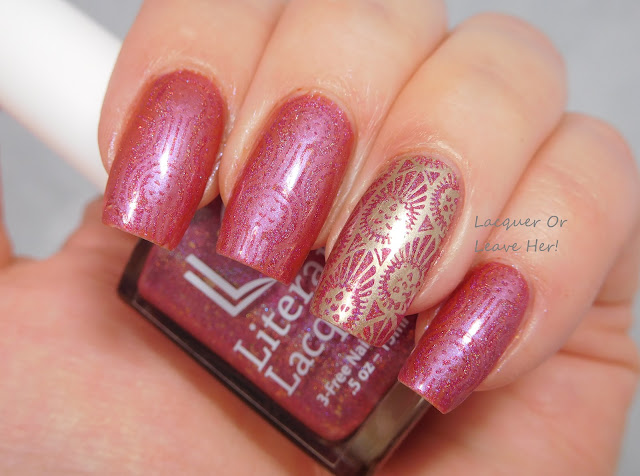
I stamped with Messy Mansion Soft Gold and Hit The Bottle Polish Peach Blow, a pink-to-coral duochrome stamping polish (I'm not sure if that one is still available, but she has tons of other beauties):


Literary Lacquers Porco Rosso + MoYou London Steampunk collection 07
Literary Lacquers Porco Rosso + MoYou London Steampunk collection 07

Literary Lacquers Porco Rosso + MoYou London Steampunk collection 07
Literary Lacquers Porco Rosso MoYou London Steampunk collection 07


Literary Lacquers Porco Rosso + MoYou London Steampunk collection 07
Literary Lacquers Porco Rosso MoYou London Steampunk collection 07

Literary Lacquers Porco Rosso + MoYou London Steampunk collection 07
Literary Lacquers Porco Rosso MoYou London Steampunk collection 07


I love how the holo still sparkles through, and the duochrome stamping polish complements the colors in the base polish and gives a different look depending on the angle. This is soft and feminine but powerful steampunk at the same time!


Happy stamping,
M.

Tuesday, July 19, 2016

Review & tutorial: Water decal nail-wraps from Charlie's Nail art

(Press samples ahead!)

Hello!

Charlie's Nail Art recently sent me these bold and beautiful red, black, and white striped nail wrap stickers for review:

Charlie's Nail Art Black Colour Stripe nail decals


Charlie's Nail Art Black Colour Stripe nail decals


When I see the word 'sticker', I think of the peel-off and stick on concept, and I've reviewed that type of nail wrap before, so I jumped right in. After about three minutes of trying desperately to figure out how to get the decals to peel off the backing, I finally figured out that they were water decals!

I've worked with water decals before, but only as part of a nail design--this was my first time trying water decals for a full-on wrap. I wasn't quite sure what I was doing, but I learned from my mistakes as I went along, and have a few tips to share with you, because these are a very inexpensive way to get a fun nail look that you might not want to try to create by hand.


Step 1: Measure the decal.
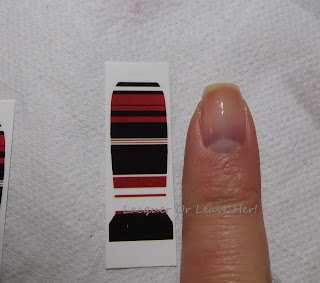

Step 1: Measure the decal


You'll notice that while there's some variation in size options, mostly the idea here is for the wrap to be bigger than your nail, and then for it to be cut down/cleaned up down to size. So take a look at the size closest to your nail and measure off what you're going to need to trim off. For the purposes of this test, I just trimmed the length, not the sides.


Step 2: Trim.
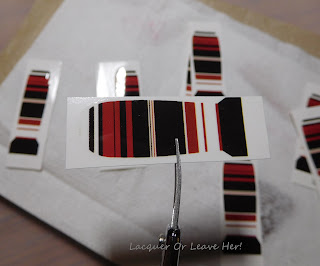

Step 2: Trim
Step 2: Trim


Cut the decal down to the size you need.


Step 3: Submerge under water.
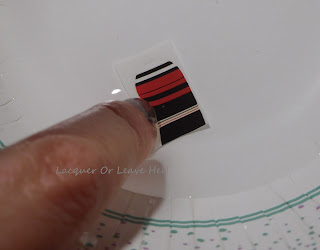

Step 3: Submerge under water


You only need to do this for a few seconds, although that might vary with the particular set...


Step 4: Slide off the decal.
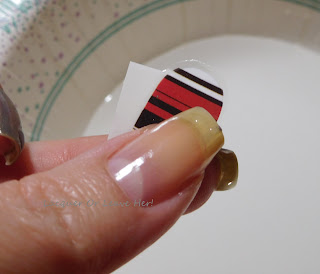

Step 4: Slide off the decal


...but you'll know you're done when the decal slides off with gentle pressure; just slide your finger over the top of the design and it will slide off the backing when ready.


Step 5. Dab off excess water.

Step 5. Dab off excess water


You're going to gently press your design where you want it over the curve of your nail; if your design is too wet, it'll slide all over the place when you're positioning it on the nail. But, if it's too dry, it won't cling to the nail. Don't worry, if you dry it too much, you can always dunk it again.


Step 6: Position your design.

Step 6: Position your design


If the decal is a little wet, it will cling gently to the curve of your nail. This isn't a strong bond--it will move if you hit it--but it will stay in place enough for you to put on topcoat.


Step 7: Put on topcoat.
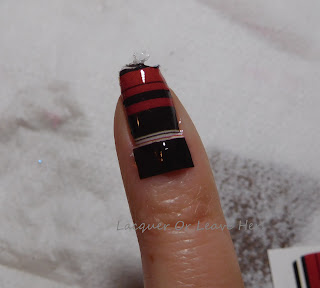

Step 7: Put on topcoat


With single strokes (don't go over the same place multiple times), cover the decal. The topcoat will 'melt' your decal into place--you can see the tip melting in the picture. This will get out your wrinkles and will curl your tip--you may want to gently direct it under the tip, but be very, very gentle.


Step 8: Run around the outside with acetone on a clean-up brush.
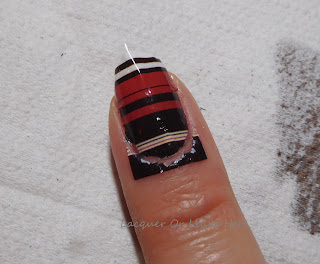

Step 8: Run around the outside with acetone on a clean-up brush


Give the topcoat 15-20 seconds to dry, and then go around the edge of the nail with a clean-up brush dipped in acetone. I found that if I tried to do this before I applied the topcoat, I got raggedy edges that were just not cute (see my picture below). But once the topcoat had set a little, I was able to clean up just like a normal polish and get a much cleaner edge.


Step 9: Finish your clean-up.


Step 9: Finish your clean-up


Once you have the excess separated from the nail, you can probably peel most of the excess right up with tweezers or an orange stick. If that doesn't work, continue on with acetone.


And, you're done! You can add another layer of topcoat if you want/need to smooth things out further, otherwise, you're done.


Here is a picture of my final manicure, and you can see my learning curve: I started with the middle finger, and didn't apply my topcoat before trying to separate the excess from the nail--you can see the edge is really raggedy. I did the ring finger next, and thought I'd help the curling along by running my clean-up brush along the edge, and the acetone just ate up the color--so I didn't do that again, lol. You can see by my pinkie I was doing pretty darn well, and by the time I finished up with my index finger, I was rockin' those decals out!
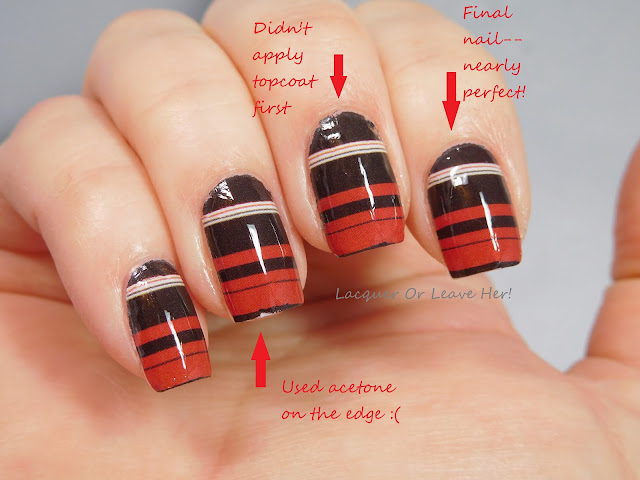

My learning curve: applying water decal nail wraps
My learning curve: applying water decal nail wraps 

My learning curve: applying water decal nail wraps


So what do I think of water-decal wraps? They're a little bit more work than the stick-on version, but with a couple of tips it's not too bad at all--and for $1.18 a set, they're a very good option for those of us who have to watch our wallet. I've made a graphic to help you remember the steps if you want to try them out:
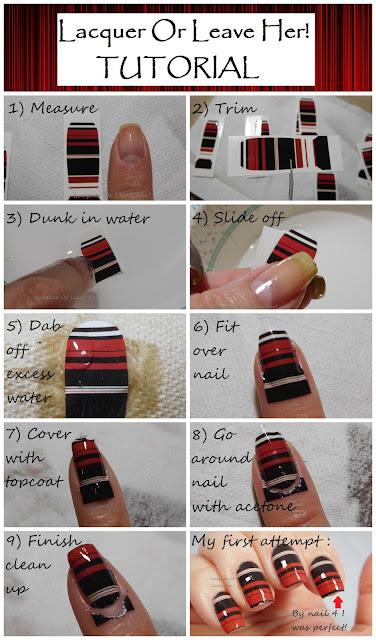
Tutorial: applying water-decal nail wraps


You can find these and lot of other designs in Charlie's Nail Art shop, and don't forget to use my code for 10% off your order: LOLAM10. You can also follow them on Facebook and Instagram for ideas and updates. :)


Happy wrapping!
M.