Showing posts with label nail tape. Show all posts

Wednesday, December 16, 2015

Review & NOTD: Christmas Tree Skittle Mani with Born Pretty Store nail tape dispenser

(Press sample)

Hello!

Born Pretty Store recently sent me this nail tape dispenser to review; I chose it actually because I tend to struggle a little with nail tape:

Born Pretty Store nail tape dispenser

Born Pretty Store nail tape dispenser


My issue with nail tape is two-fold. The main problem is that I lose the end and struggle to find it again, and in the meantime what I've already applied catches on something and pulls off. Of course, one solution to this is to cut off as many pieces as you need, and pull them off the corner of your table or some such as needed. That sounds good, but what happens is, when I pull one of those pieces off, it instantly flaps over and sticks to my hand or something else, and then I have to try to pull it back off while not destroying the tape on the artwork I'm trying to do. AND, I still can't find the end of the tape the next time I go to do another mani.

So, when I saw this, I figured it would be good for someone as nail-tape challenged as me--it will keep the end ever-ready, and maybe even help me keep the tape under control while I'm working.

I did a video review of the case here, just showing how easy it is to open and put the tape in:


I also did a second video, a tutorial using the dispenser to make the manicure you'll see below:


What I like about it:

  • It keeps the end easily accessible
  • It's easy to pull off what you need as you need it
  • It's easier to grip than the rolls of tape, so I find it easier to use while I'm applying the teap
  • It opens easily so you can change the color of your tape as often as you want
For my test mani, I did a little twist on a simple, traditional nail-tape manicure, the simple Christmas tree. Normally what you do is put on your base polish, and then when it's fully dry, you lay your tape, put the polish for your tree over it, then pull up your tape.

For my tree, I wanted the tree to be on a naked nail, and have two layers--and undercoat of glitter that would show through as the 'garland' on the tree, and the tree itself:


Christmas tree skittle mani nail tape
Christmas tree skittle mani


Christmas tree skittle mani nail tape
Christmas tree skittle mani


Christmas tree skittle mani


As you'll see in the video, I messed up my first attempt. See, what you have to do is:

1) Try not to overlap your glitter coat with your tape.
2) Let this coat dry completely.
3) Put your 'garland' tape on.
4) Put your green polish on, and give it a few seconds to set but not dry
5) Remove your tape in the reverse order you put each piece on.

So this look can be a little tricky, but I think it's worth it, because I love the spray of glitter showing through as the garland on the tree.

Here are the products I used:
Colors By Llarowe Pirates of Penzance (holo red!)
Colores de Carol (silver holo glitter!)
Colors By Llarowe Gemini Rising (Holo green!)
Color Club Marina (textured gold--I think this looks like Christmas garland!)
Bunny Nails HD-F to stamp the star pattern on the thumb and pinkie, and the star at the top of the tree
Barry M Silver and Gold Foil Effects.

I love how it came out, and have already gotten compliments on my sweet little tree.

If you get frustrated with nail tape like I do, a little dispenser like this might be just the trick for you; for $1.59, it's hard to go wrong. You can also use my Born Pretty Code for 10% off  you full-priced order:


Happy taping!
M.

Monday, August 25, 2014

NOTD: Art Deco skittle with Incoco Modern Muse

(Incoco Nail Appliques sent for review.)

Hello!

I don't know about you, but today I feel jazzy. And colorful. And happy. And I need a mani that reflects that.

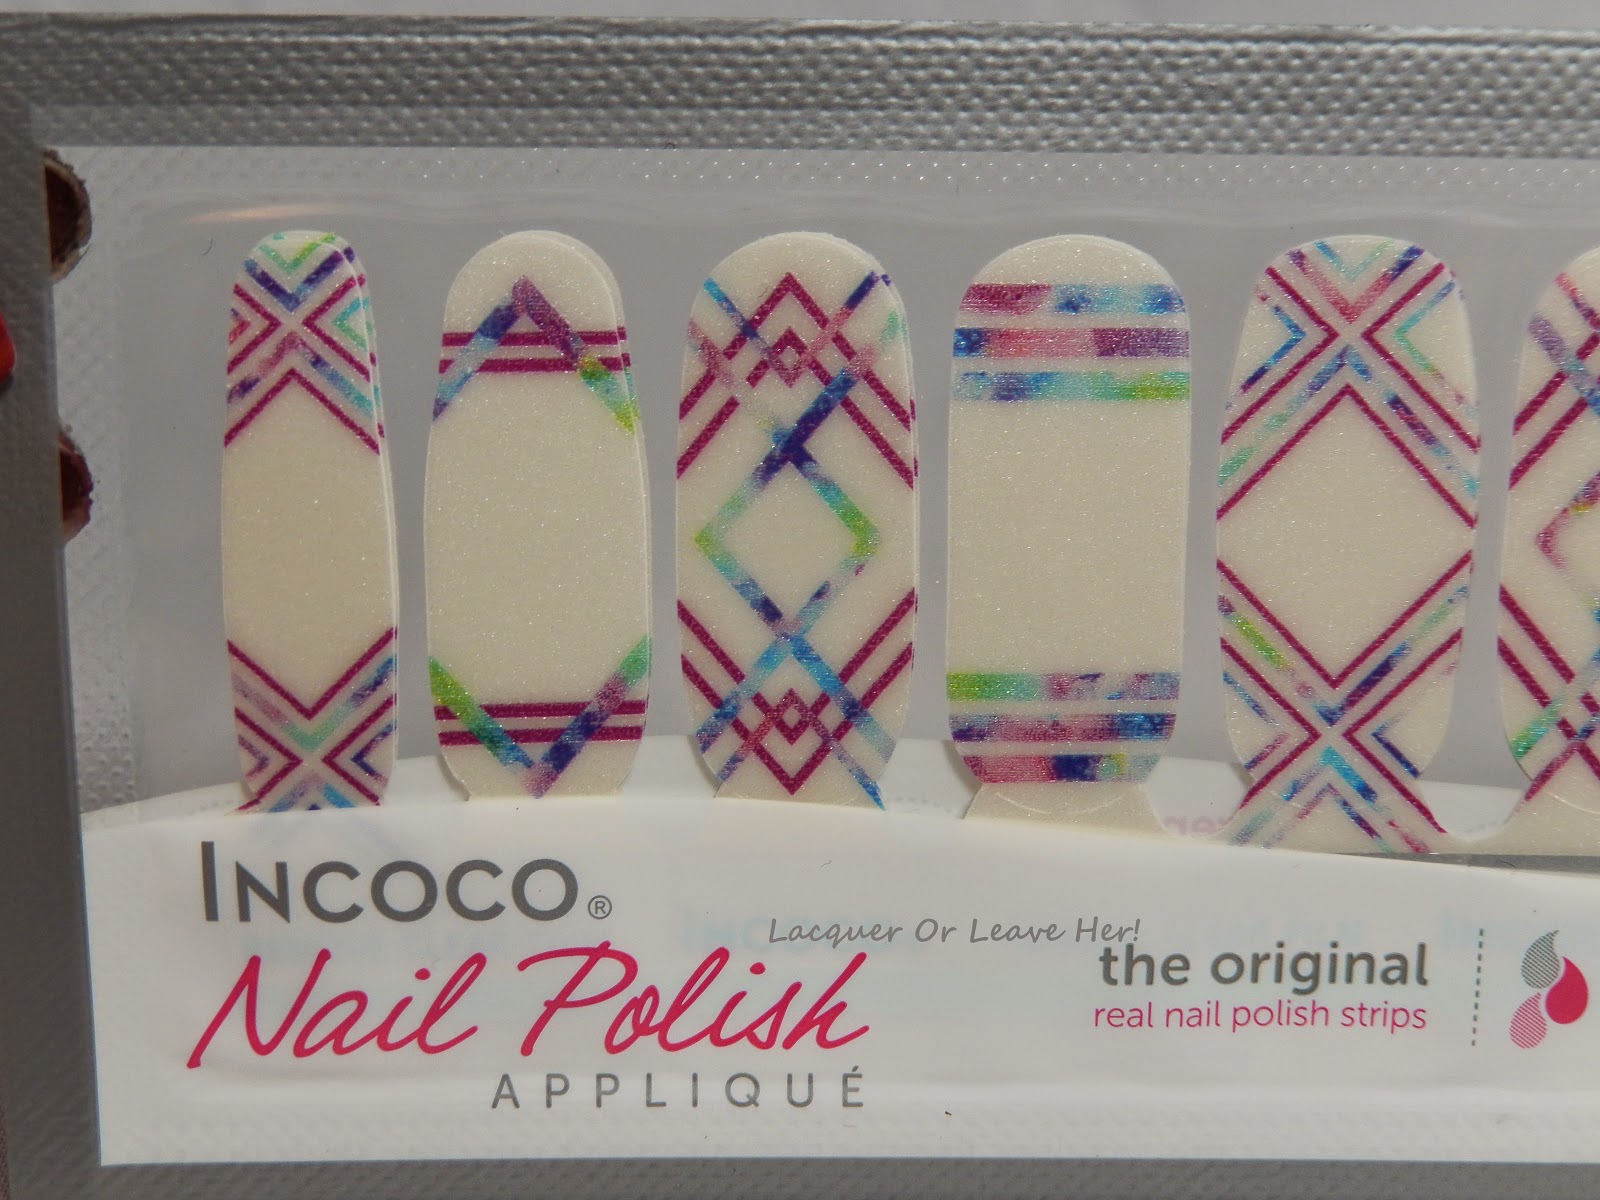
I have these awesome Incoco nail appliques they sent me for review, Modern Muse:


Incoco Modern Muse
Incoco Modern Muse

Incoco Modern Muse
Incoco Modern Muse


These remind me of beautiful nail-tape manis, the kind where you make designs with nail striping tape, paint over the tape, and pull the tape off to reveal the color underneath--but these are no hassle and no mess. And, the colors are vibrant and beautiful. So if you like the look of those manis but don't want the hassle of doing it yourself, check these out--they're gorgeous.

But you know I can't leave well enough alone. I have to play, and be all nail-arty...and these just called to me with their beautiful colors and elegant striping...so I decided to do a skittle manicure with two nails that were a sort of an opposite of the design--with white as the stripes, and the colors as the background. Here is what I came up with:


incoco modern muse zoya  muse zoya arlo
Modern Deco Muse

incoco modern muse zoya muse zoya arlo

incoco modern muse zoya muse zoya arlo
Add caption

incoco modern muse zoya muse zoya arlo
Add caption

Here's what I did:

1) I used Julep Soraphine as my base; it's a barely-there white jelly with a touch of shimmer to it.
2) I used striping tape to create designs that complemented those on the nail strips.
3) I chose my gradent colors; I wanted to pull from the colors on the nail strips, and I wanted to throw in a little bling. So I picked Zoya Muse (total coincidence on the name!) for my blue, which is a textured glitter; Zoya Arlo for my purple, also a textured glitter; and China Glaze Shore Enough for my green.
4) I sponged each color individually on the nail for control, and to get controlled overlap; I did a horizontal gradient on the ring finger, and more of a splodge look on the pinkie.

So what do you think? I love the way the glitter adds flash, and I love how the nail wraps and the nail art work together.

You can find their Metropolis Summer collection by clicking here, and don't forget to look around at their other awesome wraps, they have tons of fun designs.

Hugs!
M.

Friday, August 30, 2013

Tutorial: Remember that one time...

Hey everyone!

Remember that one time when I was featured on the Nail It! website? The mani with the stripes and studs? Well, I thought you maybe might want a pin-able tutorial image for that manicure...so I made one:


Let me know if you'd like me to put one together for the shabby chic flowers manicure I did for Nail It!, too! :)

Hugs and love,
M.

Saturday, July 27, 2013

Before & After: Lacy Petticoat

(All products in this post purchased by me.)

Hello!

I've been in a race today to get this manicure posted, so I will apologize up-front for the cat hair you may or may not find somewhere in the pictures today...>.>

Today is the next installment in the Cheeky twin post challenge I'm working on with Dina of Secretary's Nail Art, and we're on Cheeky 52--we chose the swirl image from this plate, and it's been one I've been looking forward to, 'cause I love my swirls!

I started with a base of Barielle Orange Parfait, a soft, coral-orange creme that goes almost to a melon color; this is two coats:


Barielle Orange Parfait, artificial sunlight


The formula on this wasn't great, but it wasn't too bad, either. The first coat was a little patchy, but it evened out nicely with the second coat.

Next I put on a coat of a fun glitter I recently got in a scratch 'n' dent, Nail'd It Plum Sassy, which is filled with purples, blues, and greens of all sorts, shapes and sizes! I thought this would make a pretty contrast against the soft orange.

Finally, I've been wanting to play around with masking off a portion of the nail for stamping, so I tried it out here. I masked off wedges on each nail, and stamped the image over them in white; on the accent nail, I edged the wedge in white nail tape:


What do you think? This reminds me of a pretty pleated skirt that when the folds separate, you see some hidden lace or a petticoat. I also wonder if it would look better with all of the nails taped off?

Thanks for looking, and don't forget to check out what Dina did with the image!

Hugs and love,
M.

Friday, July 26, 2013

Before & After: Where did Tracie go?

Hello!

It's time for my final flowers design for my Nail Challenge Collaborative group. This has been a fun theme, and I wanted to go out with a bang, with something that would jump out at you!

I started with a base of Zoya Tracie, an avocado green with a soft shimmer (please excuse my wounded finger!):

Zoya Tracie, direct sunlight


I love this polish and enjoyed wearing it...but then I decided to make a flower manicure with it and my plot required me to cover it up...mostly. I painted over it with Zoya Breezi, a strong sky blue creme. But before I did, I used nail tape to cover up part of the base polish in order to make flower stems. Then I used my Mash 3D nail art confetti (previously sent to me for review) for my flowers, and added a gold butterfly charm as a final accent:


Believe it or not, by using a dot of top coat to put these in place, and then putting a coat of top coat over them, none of these elements moved one bit--not even the butterfly, which as you can see sticks out a bit. In fact, when I removed the mani I was able to save the butterfly charm to use again. :)

I know this mani is a little on the 'cute' side for things I normally do, but I was really into it for some reason. Hope you like it, too!

Hugs, and don't forget to check out the other flower manis, linked below. :)
M.


Sunday, July 14, 2013

Before & After: Fashionista

Hello!!

Okay, so here is my attempt to recreate, with a twist, a look that I believe was started by Nailasaurus. She initially did this with dark stripes over naked nails, inspired by a dress that had see-through stripes, if memory serves, and many others have been inspired by it since. I thought it would be fun to do a version of this with a sassy glitter as the undies. :)

I used Lucky 13 Bowties Are Cool as my base--but keep in mind that I only used one coat here with no undies because of the look I was going for. So don't judge this as a finished polish look for this polish! It's a gold-based glitter with orange-red hexes, brown small hexes, and lots of shimmer:

Lucky 13 Bowties Are Cool, no undies, for nail art purposes

Then I put some strips of tape over in two patterns; one meant to look similar to the original style, and two diagonal nails for some contrast to create a skittle sort of look; then I painted over it with Pure Ice I'll Never Tell, a unique dark brown with silvery flakes:


What do you think? I do love this color combination, and I love how the glitter comes through. However, you can tell I did this back when I was still using pointed q-tips for clean-up, before I got better at the acetone + brush method, and it's not as clean as I would like. Also, if you look closely (okay, you don't have to look *that* close to see it, lol), you can see I tried something that didn't quite work. To mask off my areas, I put two (or three in some cases) stripes of nail tape side-by-side, to get more width, and then I painted over everything. Unfortunately this led to very tiny micro bleeding between the lines of tape; this wasn't so obvious in real life as in these close pictures, but it's there. Next time I'll just cut regular tape to the sizes I want, or I won't pain over the entire nail area. :)

In these pictures, I'm not sure how I feel about this manicure, but in real life it looked better than it does here. I think that's because the flaws that are obvious in the pictures weren't so visible, and the effect was a little more even from a distance. I'll tell you this, I love Sam's work for tons of reasons, and one of them is the impressive precision she gets on things like her tape manis! It's not easy, but she sure makes it seem like it is. :)

Big hugs and happy Sunday,
M.

Thursday, June 27, 2013

Review: Born Pretty Store Striping Tape

Hello!

I've done tons of striping manicures on this blog, and I own a bunch of nail tape. But much to my amazement, I realized a while back that I didn't have a roll of red tape; I bought the tape I have in a set where I didn't get to pick the colors I wanted. So when Born Pretty Store Born Pretty Store asked if there were items I wanted to review, I thought this would be a good opportunity to try out Born Pretty Store's striping tape.

Here is how the tape comes packaged; it comes in its own plastic envelope. As you can see, there is a lot of tape here; you'd have to work hard to run out of it unless you're doing a new striping manicure every day:


Here's a close-up on the color
I use this sort of nail tape primarily for two types of manicures. I use the tape as an accent on the nail itself, and I use it like painter's tape, to delineate patterns or areas of a design that will show after the tape is removed. I'm going to test out the tape in both of these types of manicures.

I did the first manicure for an Adventures In Stamping theme that involved stamping dragonflies or butterflies; I had an idea that I wanted to try out with Barry M Chameleon Blue, which switches from blue to purple when you put a topcoat on it. I thought it would be cool to have half of the nail in one color and half in the other, with different stamping on the halves--and what's a more perfect way to divide those halves than red striping tape, since red and blue makes purple? I stamped with Barry M Silver Foil on the blue half, and with Chameleon Blue itself on the red half (it's a great stamping polish). I stamped overlapping the tape so it would look like the dragonflies were hovering above the design (well, that was the plan, lol):


This is a rigorous test of the striping tape because I wasn't able to cover the tape up with topcoat--if I did, it would have changed the color of the polish underneath. I took this picture the day after I did the manicure, after sleeping with the tape on. As you can see, there is just the teensiest bit of peeling starting at the tip of the nail, and none at all at the cuticle end. I've had other nail tapes that don't stay put that well even when I have them slathered in topcoat. :)

I also decided the next day that I wanted to change up the design a bit, so I redid two of the nails, but left the middle and ring untouched:


This was taken at the end of the second day, and you can see there is a tiny bit more peeling, but still remarkably little considering there was no topcoat over it and it had gone through a fair amount of abuse at that point. If you're looking for a striping tape that will stay where you put it, this one will have some staying power for you.

I also wanted to test the tape out to see how well it performs when used as a tool for masking designs. In this manicure, I started with a base of Zoya Logan and Ivanka (Logan on the pinkie and middle, Ivanka on the ring and index), and used tape to create a design on the nail. I then sponged over the nail and the tape with a gradient of Barry M Silver Foil and Gold Foil (although it didn't turn out to be very noticeable in the pictures, it's there if you look carefully :) ), and removed the tape. I finished the design with some rectangular rhinestones:


The lines are crisp, the tape stuck well and didn't allow leakage underneath, but also came up easily and didn't pull the polish when I took it off. When I was working with it, it stayed put and that made it easy for me to trim the ends and place the next pieces accurately.

Overall, I found this tape as easy to work with as any other I've tried, in fact a bit more. It was also impressively durable, and I like that you can pick individual colors rather than have to be stuck with a bunch of colors you may not like.

If you'd like to order this or any other products from their store, I have a coupon for 10% off that you can use:


This is not an affiliate link and I don't make any money when/if you use it. However, if the code is used 10 times, Born Pretty Store will sponsor a giveaway on my blog, which means free products for you. :)

Thanks for looking! I hope you're having a good week. :)

Hugs and love,
M.

(The nail tape used in this post was provided for my honest review.)

Sunday, May 5, 2013

Tutorial: Fun with textured polish and striping tape!

Hello!

As you know, I recently received most of my shipment of the Julie G Gum Drops collection. With this and the three Zoya textured polishes I have, I now have a fair number of textured polishes, and that makes me want to play and experiment!

One thing I wanted to play with was striping tape manicures. I wasn't sure if they'd work because it's much harder to create a clean seal with textured polishes than smooth ones...and sure enough, when I first put the striping tape down, I found that it didn't adhere well at all. But regardless, I was determined to see it through and see if I could make it work. I'm happy to say that without too much difficulty, I did. If you know what to expect, I don't think you'll have a problem, either.

For my play session I started with Julie G Blueberry Fizz:


Let's use my index finger as the main example of how I did the striping:


There are a couple of things to notice here, and steps to take carefully:

1) The striping tape on the manicure doesn't stay put very well, particularly at the edges. The more you press it down, the more it will not want to stay put. So put it down where you want it, put the next piece down, etc., and then once you have all pieces placed, give it one final press-down and then quickly polish it.

2) See how the tape ends at my cuticle, and doesn't go past it? Because the edges of the tape want to stick up and not stay on the textured polish, you need to cut the edge close to cuticle or sides of your nail. If you do, they will stay down on the polish, as you can see my ends doing there. You don't have to do that on the free-edge of the nail (where you see mine sticking out); you can bend those over a bit, and use these edges to remove the strips when the time comes.

3) As much as possible, polish the nail in the direction of the nail tape, and only stroke once; this keeps the polish from bleeding under the tape. Then, pull off the strips right away, in reverse order from how you put them on, just like you would with a regular tape mani of this sort.

Here's how it turned out:


[ Now keep in mind, this isn't meant to be a finished wear-outside manicure, I was just playing around and testing things out. It's just for illustration purposes. : ) ]

You can see the index finger came out really well, as did the ring finger. On the middle finger and pinkie, I tried to do something different; I thought it would be cool to turn the design into a V, after I had done the same initial design as I did on the other nails. I altered the design by going over part of it with a second coat of my polish (China Glaze's Def Defying), and as you can see, it came out patchy. Also, if it had been equal coverage, it would have covered the texture, which I didn't want. Either way, it looks different and gunky from the rest, and I consider those two nails a fail. Next time I'll just tape the design that way in the first place.

The last thing to mention is that if your polish does seep a bit under your tape, I found it really easy to fix with the smallest dotting tool I have--I just literally pushed the edge of the polish to where I wanted the line to be, using the top of the dotting tool. The polish didn't seem to fully adhere to the textured polish until it was fully dry, so this was no problem at all, and left no residue. You can't even see the two places where I did it--I can't even remember where I did it, looking at the pictures now. :)

All in all, this wasn't nearly as impossible as I thought it was going to be, or as it seemed like it would be when I first tried to put the striping tape down on the polish. So if you go into it knowing that the tape doesn't stay down firmly like in regular manicures, but have faith it will work anyway if you follow my tips, you'll be okay. :)

Thanks for reading and I hope you found this helpful!

Hugs and love,
M.


Sunday, February 3, 2013

Before & After: Simple Superbowl nails

Hello!!

Today I have a quick post, to show you the nails I wore to the superbowl party I attended. I'm going to keep it short because my team lost, so I'm pouting a bit...but I'm still proud I represented and I'm sure they'll go all the way next year!!

I started with a base of Maya For Michelle (Indie Alert!). You know I love red, and you know my name is Michelle, so how could I possibly NOT buy this polish? I didn't disappoint--it's a very earthy red, just different enough from anything else I have to make it worth it. Plus...there is a pretty pink shimmer to the finish when the light hits it:


In inside light, the pink doesn't show as much, and the first time I wore this polish, it struck me what a perfect polish it would be for a San Francisco 49ers manicure. I used some french-tip guides to add cool gold tips, using Barry M Gold Foil. Finally, I stamped a little helmet on the accent nail using Konad Black and Cheeky plate CH35:


Go Niners!

Don't worry, there's always next year!
I am so proud of those crisp lines, all due to some awesome tips from my readers! I did a tape mani a short time ago, and got some lines that were not straight. I asked if anyone had any tips for doing better, and I got two great ones that worked really well here:

1) Citygirl907 told me that I should try to make sure the edges of the tape/guides are pressed down really well so I don't get leakage. I pressed down very, very hard on this mani, lol.

2) Vwolf suggested I do a coat of topcoat before painting the tips. So I did. :)

3) Snookie Wegner told me to start with my brush on the tape/guide, and brush away from the tape/guide, down off of it across the nail. So I tried it that way.

I don't know if it was only one of these tricks that worked, or the combination of all three, but something definitely worked and I'll be doing all three of these from now on! So for any of you who struggle with this type of manicure, give these tricks a shot. If they can get zig-zags this nice, they can work for any sort of taped-off mani. :)

Thanks everyone for your help with the tips, and thanks for reading!

Xoxox,
M.


Thursday, January 17, 2013

Before & After: Quilt Envy

Hello!!

Today's challenge prompt is to try a technique you haven't tried before. I've been wanting to try a legitimate stab at quilted nails, but haven't had the chance (although I did do that one cheat with stamping). So I've given it a shot today.

I started out with a base of Ulta Envy, which turned out to be a very rich evergreen; I don't know why I keep being surprised when Ulta polishes turn out to be very nice, I guess it's because of the $2 sale price, lol, and it just goes to show you don't have to pay a lot to get good quality polish:

Ulta Envy

Then I put down nail tape in criss-crosses, trying to keep the grid as straight as possible. I decided only to do it on the accent nail, and do a sort of French-y thing on the others with the nail tape and sponging. Then I sponged over with The Polish Bar's Jasmine, a sweet shimmer polish with a bit of iridescent glitter:


Ulta Envy + The Polish Bar Jasmine

All quilted and cozy. :)
Because Jasmine already has glitters in it, I didn't put anything at the cross-points of the quilting. I do like this look, and it's fairly easy--the hardest part is getting the nail tape to be spaced evenly, but that's easy enough with a little patience. I also really like these two polishes together, and am going to add them to my list of cool combinations to work with in the future. :)

Thanks for looking, I hope you like it! Please check out the other manicures from the challenge prompt, linked below. :)

Xoxox,
M.

Wednesday, January 16, 2013

Before & After: Private School with honors

Hello!!

Today's prompt in the 31 Day Challenge is 'color opposites'. One of my favorite sets of contrasts is white and black with red, or white and grey with red. That might be one of the reasons I love Pretty & Polished's Private School so much; at first glance it looks like a grey polish with white and black hexes...but then...when you look closer...bah-bam! Awesome red microglitter!

Pretty & Polished Private School

Love that microglitter...it's the wild side of that proper private school straight-A student!

So I decided to do something simple to accent that. At the schools I went to, if you graduated with honors, you wore a special set of cords hanging around your neck and down your shoulders over your gown on graduation day. So I decided to make a set of honors ropes for this lovely polish with nail tape and rhinestones:


My cuticles don't graduate with honors these days, that's for sure. I've been putting cuticle oil on them 1-2 times a day, but the combination of daily polish changes and weather have been taking their toll. I'll try to get them in better shape!

Anyway, it's a fun, simple mani with some contrasting colors, and I'm pretty happy with how it came out. Now, off to bed with me!

Thanks for reading, and please check out the other manicures linked below. :)

Xoxox!
M.