Showing posts with label dried flowers. Show all posts

Tuesday, August 21, 2018

Beautometry's My Mani Box: Unboxing And Review!

(Press samples and affiliate links ahead!)

Hello!


So, I have to admit...I love subscription box services. I've belonged to a few, and I love getting a little box of surprises each month that makes me feel like I have a little piece of Christmas all year long.


If you haven't heard of it, Beautometry has a monthly subscription box they call "My Mani Box", designed for nail stampers that gathers goodies from all around the world according to a different theme every month. And, they recently sent me two boxes to evaluate. So today we're going to take a look at the May box, which has a dinosaur theme, and see what we see.


Beautometry's May My Mani Box

First up--a gorgeous multichrome magnetic flakie polish, Ms. Sparkle Fallen Kingdom:

Ms. Sparkle Fallen Kingdom

Ms. Sparkle Fallen Kingdom

Here's what it looks like on--I applied the magnet at the top of my nails, diagonally:


Ms. Sparkle Fallen Kingdom


Ms. Sparkle Fallen Kingdom

Oh, my, gosh--this polish is amazing! Even without using the magnet on it, it's stunning, but then when you add the magnet--just wow.


The box also included a pot of dried flowers and leaves:


Dried flowers/leaves from Beautometry's May Mani Box

And this box came with THREE plates!


MoYou London Mother Nature Collection 18

MoYou London Mother Nature Collection 19

Clear Jelly Stamper LC-36

So, to sum up, here's what you get:


Beautometry's May My Mani Box


Okay, before I show you the manis I did with this, let's talk about whether or not I think this is a good value. If you buy only a single box, the cost is $35, plus $5 shipping. If you sign up for more than one box, the price goes down depending on how many months you sign up for. So, let's assume that we're looking at the most expensive version of this, $35. I'm not going to count the shipping, because you'd have to pay the shipping if you bought the items anywhere. So, let's do a tally:

2 MoYou London plates = $19.98
Clear Jelly Stamper plate = $14.50
Ms. Sparkle magnetic polish = $9.75 (Probably more than this because it's a specialty polish)
Magnet = $8.00
Dried flowers = $0.50 (I couldn't find single pots, but I found 12 pots for $10, so I rounded down)
Total value: $52.73

So, yes, I'd say this is a very good value for the money--especially since the products, like MoYou London plates, are top-notch quality. Of course, you don't get to pick your items, so you risk getting something that you don't like. But, I think what that comes down to is whether the experience of getting a box full of surprises is something you enjoy--if so, that more than makes up for the risk. If you're not, these sorts of curated boxes probably aren't the best way to go. :)


So, on to the manis! For my first mani, I started with Ms. Sparkle Fallen Kingdom, and stamped images from MoYou London Mother Nature 19. I stamped with Messy Mansion Soft Gold:


Mani made with Beautometry's May "My Mani Box"

Mani made with Beautometry's May "My Mani Box"


For my second mani, I wanted something simple. I started with a base of Zoya Alyssa, and then stamped an image from MoYou London Mother Nature 18 with Hit The Bottle Polish Holo There Beautiful:

MoYou London Mother Nature 18 over Zoya Alyssa, stamped with Hit The Bottle Holo There Beautiful

MoYou London Mother Nature 18 over Zoya Alyssa, stamped with Hit The Bottle Holo There Beautiful


For my final mani, I started again with Ms. Sparkle Fallen Kingdom. Then I used Clear Jelly Stamper LC-36 to stamp images, with Messy Mansion Sterling and Hit The Bottle Polish It Mossed Be Love:


Mani made with Beautometry's May "My Mani Box"


Mani made with Beautometry's May "My Mani Box"

I have to admit...I've been admiring that dinosaur plate for a while, so I had a blast making a pterodactyl manicure. :)

You can find Beautometry's My Mani Box here, and you can follow Beautometry around the interwebs here:


Big hugs,
M. xoxo

Follow me! 

Friday, August 17, 2018

The Digit-al Dozen Does Tropical, Day 5: More Tropical Flowers

(Press samples and affiliate links ahead!)

Hello!


Okay, so, I wanted to end the Digit-al Dozen's tropical week with a bang, so I saved my favorite look for last!


This mani features dried flowers--so I made a tutorial showing how I made the look, and sharing my tips for working with dried flowers:


The dried flowers I used are from Beauty Big Bang:


Dried flowers from Beauty Big Bang


For my mani, I started with a gradient of Zoya Darcy, Sheri, and Sally Hansen Orange Impulse. Then I stamped an image from UberChic Beauty's Texturelicious 02 plate, and stamped with BeautyBigBang Gold. I painted my target finger with a coat of Orly Bonder, then stuck on my flowers. I finished by topcoating it all. Here's how it turned out:


Dried flowers and UberChic Beauty Texturelicious 02 over a gradient of Zoya and Sally Hansen polishes

Dried flowers and UberChic Beauty Texturelicious 02 over a gradient of Zoya and Sally Hansen polishes


Here's a macro of the flowered nail:

Dried flowers and UberChic Beauty Texturelicious 02 over a gradient of Zoya and Sally Hansen polishes


And here it is matted:

Dried flowers and UberChic Beauty Texturelicious 02 over a gradient of Zoya and Sally Hansen polishes

Dried flowers and UberChic Beauty Texturelicious 02 over a gradient of Zoya and Sally Hansen polishes


I hope you've enjoyed the Digit-al Dozen's tropical week--it made me want to fly off to Hawaii, but I'll have to settle for a tropical drink...while I check out what the other ladies did, linked below. :)


Big hugs,
M. xoxo

Follow me! 

Saturday, June 22, 2013

Tutorial: Working with dried flowers :)

Hello!

I had a request for a tutorial on working with dried flowers, and I'm happy to report I've finally managed to pull it together!

There are two main kinds of dried flowers you'll find when you buy them for nail art:


On the left is a single pressed flower, and on the right is a group of little flowers that look like spokes on a wheel. The main difference here in my opinion is that I like the way the single flower looks as is, but I don't want to work with the 'spoke' flower as is, I want to work with the individual flowers in the cluster.

The simple, easy way to work with dried flowers is to apply topcoat to your mani and simply lay them on the topcoat; finish or not with another layer of topcoat as needed. In my opinion, this only really works well if you are working with the single flower type on the left; things got a little bit more tricky for me when tried to work with the spoke flower either as a whole or when I split it up. The problems are that if you have multiple pieces, your topcoat is going to dry faster than you want it to in order to allow you to adhere the flowers well. Maybe I just work too slowly, I don't know...but I have another method I use when I want a more intricate pattern and don't want to have to worry about that dry time.

Another issue that comes up with dried flowers is that they are extremely fragile. Even when putting on a single flower, you can easily knock off a petal or part of a petal, especially if the edges are curling up and you're trying to push it flat. You do want to work carefully regardless, but this method also minimizes the damage somewhat. :)

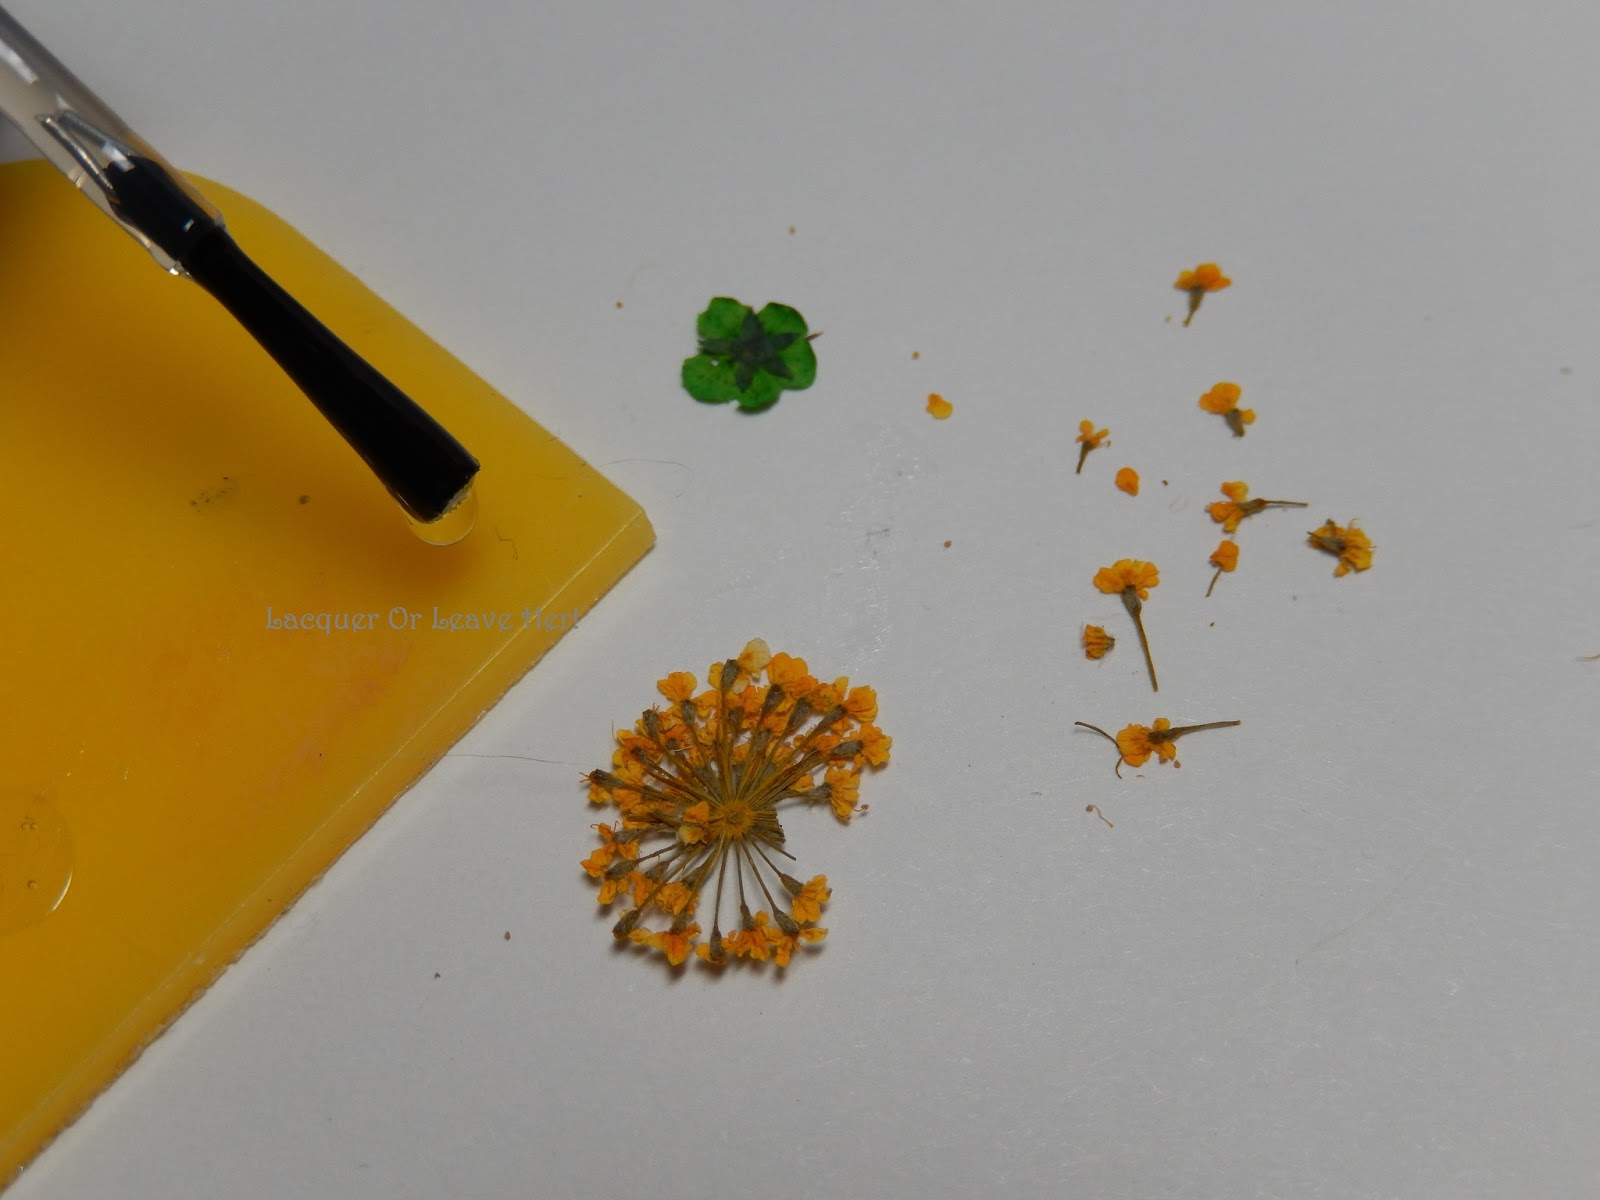
Step 1) Let's start by cutting off some little flowers from the spoke. If you just snip them with your scissors, they'll fly everywhere, break, and be unusable. So what you do instead, is put your finger over the flowers to secure them, and snip them off so your finger prevents them from flying off:


Now you have one or more flowers beautifully separated from the rest:


Step 2) Put some of your topcoat on a palette of some sort; I use a random piece of plastic. You're going to use this to attach your flowers:


Step 3) Using a dotting tool, put a dot (or more) of topcoat where you want your flowers to be. I'm going to attach both a single flower, and lots of little minis from the spoke flower. First, for the single flower, I'm going to put 5 dots, one for each petal, approximately where I want the flower to be (This will adhere each petal and help keep them from breaking while you work):


Step 4) Using the remaining topcoat on your dotting tool, carefully pick up the flower by touching the dotting tool to the flower. Then place it down on the nail where you put your topcoat in the previous step:


If you don't have enough topcoat left on the dotting tool to make the flower stick, put a tiny bit more on the dotting tool--but not a lot. If you put a lot, the flower won't want to come off of your dotting tool, and you'll break the petals trying to get it off. So err on the side of too little.

Step 5) For the smaller flowers, which I want to arrange into a bouquet sort of pattern, you're going to follow the same procedure, with two differences. First, use the smaller end of your dotting tool to make it easier to be precise and see what you're doing. Second, apply one dot and flower at a time--one dot of polish, one flower on top, next dot of polish, next flower on top, etc.


Here's what things look like so far. Notice how the petals of the green flower curl up a bit. There are two ways to fix this. One way is to use the small end of your dotting tool and put a bit more topcoat just under the edges that are sticking up, and then gently pat them down with your tool onto the polish. The other way I'll show you here.


Step 6) Cover your flowers in a generous coat of topcoat:


Step 7) Push down any parts of the flower that are sticking up into the topcoat with the small end of your dotting tool. You may have to have patience, because the topcoat needs to be thickening a bit or else they'll just pop back up; so push them down, and if they don't say, wait a couple of seconds and push them down again. Gently. :)


Step 8) Once your flower is all pushed down where you want it, put on a final coat of topcoat. If you didn't have to push anything down into your previous coat of topcoat, you may be able to skip this step; if I had only had the yellow flowers here, I would have been able to do that. But if you had to manipulate the flowers a little, it will leave a bit of a messy appearance in the topcoat, so a second coat will smooth that right over:


And here is your final result! Using this method I was able to shower after working out, and wash my hands several times through the day without losing one petal from my mani--and on that mani I had flowers on every finger. If you only use one coat of topcoat, I suspect you'll get a bit less durability. :)


Like I did last time, I made a little collage of most of the steps for ease of use:


Please let me know if anything here is unclear, and I'll fix it! Also, I think I'm starting to get the hang of tutorials, so please please please let me know if there are any techniques you would like to see, and I'll do my best to make a tutorial of it for you. I'm not sure what you guys would like to know, so chime in and give me direction!


Hope this was help; thanks for looking. :)
M.