Showing posts with label dotticure. Show all posts

Tuesday, February 21, 2017

Review: Messy Mansion Crystal 01 + Bows from Charlie's Nail Art

(Press samples ahead!)

Hello!


Remember the olden days when there was no such thing as clear stampers and layering plates? Good times...NOT.  Thank goodness we're living in more enlightened times, and thank goodness for these layering plates from Messy Mansion:


Today we're gonna take a closer look at Messy Mansion's Crystal 01:


Messy Mansion's Crystal 01

If you're on your way to a party or just want to look like you've got a party on you hands, this is the plate for you! Presents and banners and balloons, and even ice cream, all done in layers so you can get all the color your heart desires.


The images are all different sizes, so here's a shot next to a ruler to give you a sense of how big they are:


And how do they stamp? Really well:


I did this on camera, so my layering isn't perfect, but you get the idea!


For my sample mani, I wanted to play around with the bows, and was inspired to pair them with these cute bow charms sent to me for review by Charlie's Nail Art:


To play up the pink and white of the charms, I started with a base of Blue-Eyed Girl Lacquer Best-Selling Show & A Love Such As This, and Spellbound Nails Milky Way. I used a dotting tool to add polka dots, and then stamped my bows with Messy Mansion Chalk and Petal, and then added on my bow charms:


Messy Mansion Crystal 01 & Charlie's Nail Art bow charms over Blue-Eyed Girl Lacquer Best-Selling Show, A Love Such As This, and Spellbound Nails Milky Way


Messy Mansion Crystal 01 & Charlie's Nail Art bow charms over Blue-Eyed Girl Lacquer Best-Selling Show, A Love Such As This, and Spellbound Nails Milky Way

Messy Mansion Crystal 01 & Charlie's Nail Art bow charms over Blue-Eyed Girl Lacquer Best-Selling Show, A Love Such As This, and Spellbound Nails Milky Way

What do you think?! I love this soooo much, it's so pin-up and retro and cute. And I love how all of these colors play together! And I was impressed--these bows stayed on much better than I expected them too, I think because the edges are rounded, so they didn't catch as much as I expected them to. I wouldn't expect them to stay on for days at a time, but for an event I think you'd be okay. :)


You can find the bows in Charlie's Nail Art store, and you can use my code, LOLAM10, for 10% off your order. You can follow them here:


You can find the plates and polishes in Messy Mansion's store, and you can follow them here:


Happy stamping!
M. xoxo

Tuesday, June 23, 2015

Before & After: For Owl's Sake (BPS BP-L014 & BP-L019 + Ellagee Summer Polishes)

(Press sample;affiliate links)

Hello!

Born Pretty Store recently sent me some of their newest plates to review, and I was excited to see they've started to make larger, rectangular plates for more coordinated images.

Here's the video showing the images and discussing ideas for using them:


And here are still shots of the two plates I'll be using in my mani today. First, BP-L014, a henna-style floral collage plate:

Born Pretty Store BP-L014

Born Pretty Store BP-L014

Born Pretty Store BP-L014

Can I say how much I love this plate? There are big areas in the collage style, to give you that flexibility to create tons of coordinated manis, but they are also separated enough to allow you to isolate edges and elements if you want. In terms of ease-of-use, this is a beginner version of a collage-style plate, while being an advanced plate in terms of beauty.

But wait--how does it stamp?


Born Pretty Store BP-L014 stamping test


Pretty darned good. There is a smudgy bit at the middle-top of the left image that is clearly user error; otherwise, the lines and details are all wonderful.


How big are the flowers on this plate? Excellent question--here they are next to a standard Konad so you can estimate:


Born Pretty Store BP-L014 vs. Konad


And now let's take a look at BP-L019, a whimsical plate featuring adorable owls in quantity:


Born Pretty Store BP-L019

Born Pretty Store BP-L019

Born Pretty Store BP-L019


This one also stamps very well:


Born Pretty Store BP-L019 stamping test

And here it is next to da Konad for size reference:

Born Pretty Store BP-L019 stamping test vs. Konad


Okay, let's get down to it. For plates like this, you have to have something fun and awesome for you base, so I chose Ellagee Seaside Cottage from her Beach Bum summer collection (see my review here):

Ellagee Seaside Cottage
 
Ellagee Seaside Cottage

Then, I added a coat of Ellagee Bubble Up (from her All Summer Long glitters collection, review here) to my middle finger and my thumb. Next, I stamped one of the owls from BP-L019 with Ellagee Salty Breeze (yes, it stamps!!) onto my ring finger. I stamped flowers from BP-L014 onto two stampers and filled them in using the reversed-stamping technique; I stamped them with Sally Hansen Brisk Blue and filled them in with Ellagee Salty Breeze and Sally Hansen I-Rush Luck. Finally, I finished up with a few dots for the owl's eyes and the center of the owl's flowers.


For Owl's Sake

For Owl's Sake


I love how these colors all play together. Bright. Happy. Fun, Summery. The kind of manicure that just makes you smile when you look down at it. :)

And don't forget, you can get 10% off of your non-sale-priced order at Born Pretty Store using my discount code:


Happy polishing!
M.

Wednesday, June 3, 2015

Before & After: Serenity Style

(Some polishes originally sent for review; contains affiliate links)

Hello!!

I couldn't resist playing around with the Zoya Island Fun collection (full review here)--the colors scream out for nail art! For this mani, I started out with Zoya Serenity, a lovely periwinkle blue-purple creme:


Next I stamped using Zoya Leah from the Satin Naturel collection (full review here), then I used my dotting tool to decorate with Zoya Cecilia and Demetria (also from the Island Fun collection) and Zoya Severine (a gold that came in a mystery trio):


Zoya Serenity with Winstonia 313

Zoya Serenity with Winstonia 313

Zoya Serenity with Winstonia 313

Zoya Serenity with Winstonia 313


I used Winstonia 313 for the stamping (you can see my full review of this set here):


Winstonia 313


What do you think? I think this looks like a beautiful sari filled with the colors of a gorgeous peacock. I love how well the colors in this collection play together!

Happy polishing,
M. 

Wednesday, January 21, 2015

Before & After: Subtle Peacock with Born Pretty Store 04

(Press Sample)

Hello!

Born Pretty Store recently sent me several of their plates to review; I previously did a full post showing each plate; you can find the post here if you missed it, and here is the video if you missed it:


I'm back today with a manicure using BPS 04; I adore the peacock on the middle right, and wanted to see if I could do something magnificent enough to live up to it. :)


Born Pretty Store 04


For the base of the manicure, I chose Color Club Under Your Spell, an exceptional grape-purple-to--pewter-and-olive-green duochrome textured polish with a healthy dose of purple glitter and even a sprinkle of holo glitter:

Color Club Under Your Spell

Color Club Under Your Spell

Color Club Under Your Spell

Color Club Under Your Spell

Color Club Under Your Spell

This is, without a doubt, one of my very favorite polishes, certainly in my top 20. I could look at it all day...sigh...


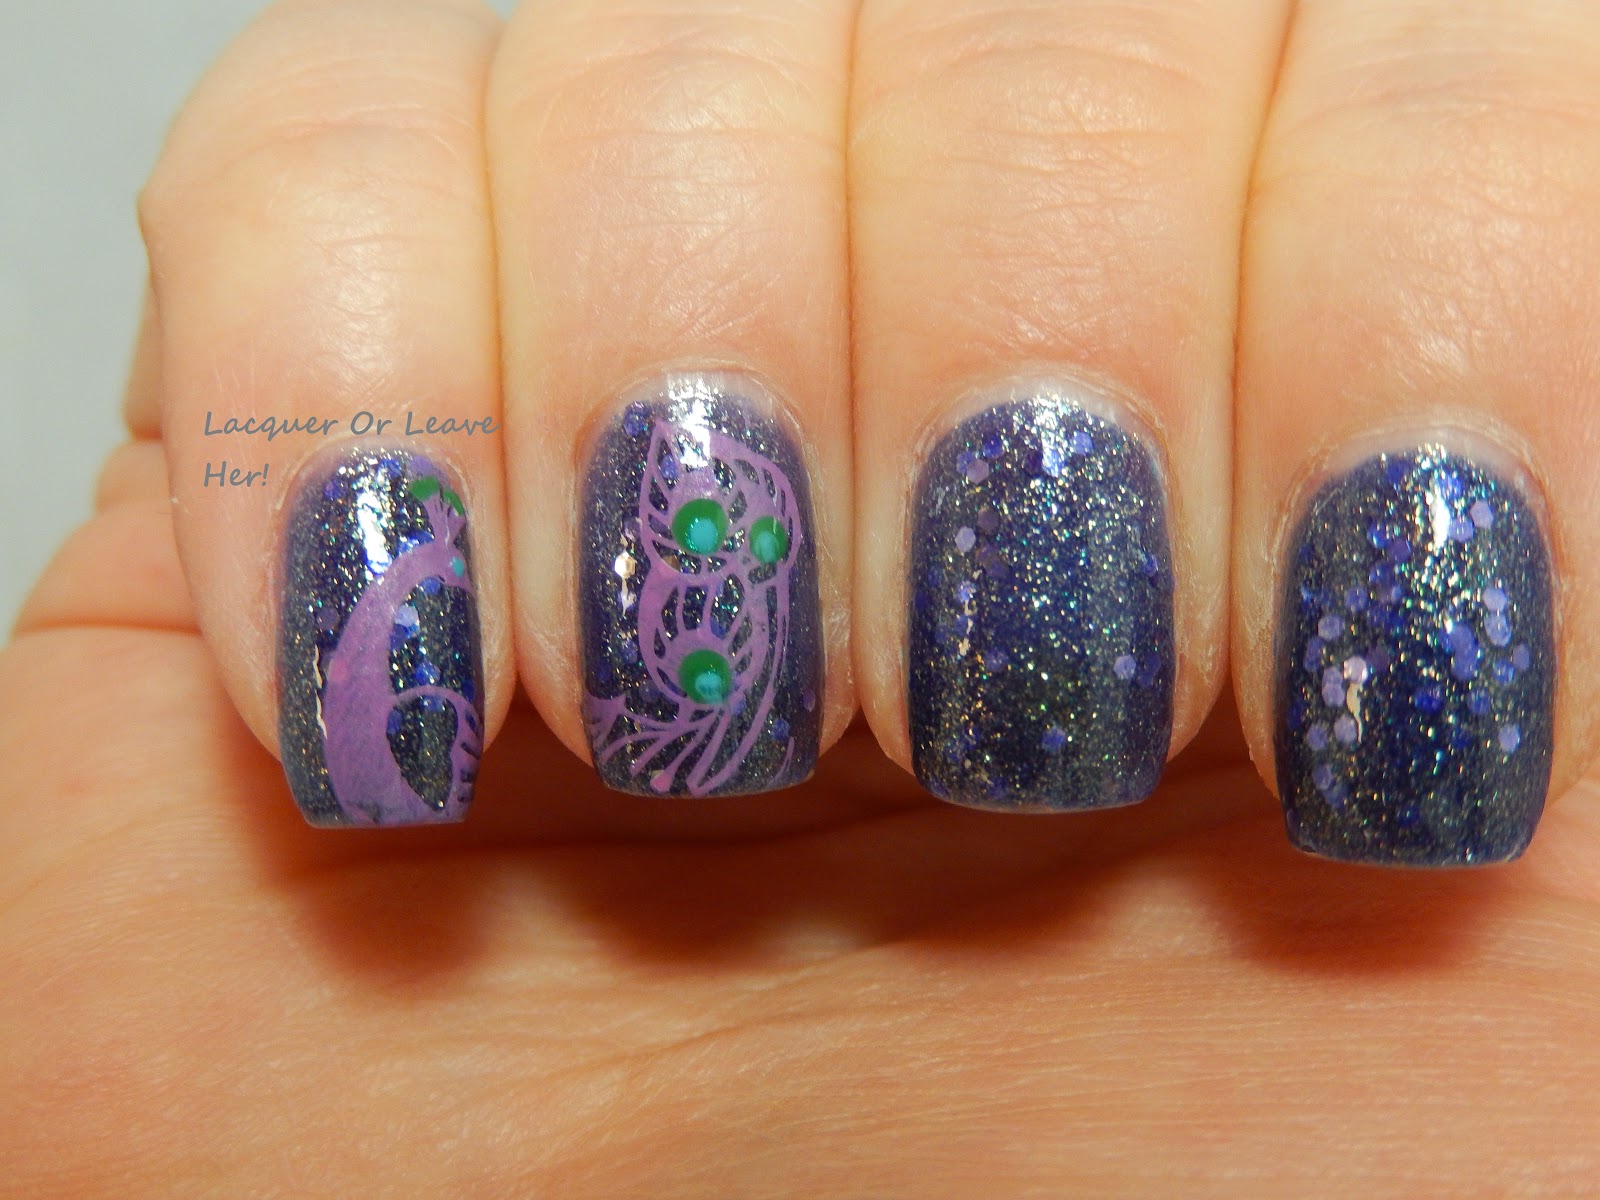
I stamped my peacock over my pinkie and ring fingers, showcasing the head on one finger, and the lovely tail feathers on the other. I stamped with Sally Hansen Insta-Dry Lively Lilac, and then accented it with dots of I-Rush Luck and Brisk Blue:


My-pretty-peacock
My pretty peacock

My pretty peacock
My pretty peacock

My pretty peacock
My pretty peacock

The stamping is crisp, clean, beautiful--no issues at all with the plate. And I just love the feel of this peacock, it has a lovely Art Nouveau feel to it. And I love how the dotting on the peacock plays up the glitter on the other nails. This is one of those manis I never wanted to take off; I wore it for nearly a week. :)

Don't forget that you can use the code MCL91 to get 10% off of your order at Born Pretty Store, and you can use it as often as you like.


I hope your hump day is treating you well, and your short week has been good to you!
M.


Sunday, December 7, 2014

Review: MoYou London Cookbook Collection 03

(Nothing to disclose)

Hello!

Here is the last of my three-part series on the two coffee-themed plates from the MoYou London Cookbook collection--if you're like me, you can't get enough coffee, and you can't get enough of these plates.

Yesterday I reviewed plate 04; click here to see that review.

Today I'm reviewing plate 03; let's start with the video:


This is, in essence, the XL version, and plate 04 is the 'regular-sized' version. In case you haven't seen my comparison video of MoYou London's XL vs. regular-sized images, it basically breaks down like this: the regular-sized images are almost the same size as Konad images, while the XL images are larger. So if you have longer/wider nails and generally struggle with Konad, you probably want the XL plates. But if you have smaller nails or want to make sure you get the entire image on your nail and don't care about the negative space, the regular-sized images are the way to go.

Here are the stills of the plate:


MoYou London Cookbook 03

MoYou London Cookbook 03

MoYou London Cookbook 03

I love the latte foam images on these plates sooooo much, and I adore the bottom image on this plate, with the steam flourishes going over the words. I think this would make an amazing manicure stamped over the five nails, transitioning from one portion to the next of the image.

Two days ago I showed you the manicure I did with these plates (click here to go to that post); here it is again, so you can take a look at the image on my middle finger, which is from this plate:


You can see that the center portion of the image fit completely over my nails, leaving little room for the surrounding dots (my nails are super curvy, but yes the 'C' and the second 'E' are there). So if you want the smaller version of this image and the others like it, stick with plate 04.

I hope this series of posts have helped you decide whether these plates are right for you! Now I'm off to throw back some espresso...mmmmmm...

Hugs,
M.

Saturday, December 6, 2014

Review and comparison of MoYou London Cookbook 04 (featuring 03)

(Nothing to disclose)

Hello!!

Yesterday I showed you a coffee-themed manicure...when I saw the new coffee-themed plates in MoYou London's Cookbook Collection, you know I had to jump all over them. I'm gonna review each of them separately, but I'll start today with plate 04, because I compare both 03 (which is basically the XL size version) and 04 in this video. Tomorrow I'll be back with a separate review for 03.

Here's the video:


And here are the stills:

MoYou London Cookbook 04

MoYou London Cookbook 04

MoYou London Cookbook 04


And here is the plate next to a standard Konad plate; the sizes are nearly identical, so if you have no problem with Konad, you'll have no problem with these. If Konad aren't quite big enough for you, think carefully about how you want to use the images and consider whether the XL version (plate 03) will work better for you:


MoYou London Cookbook 04 vs. Konad


And to show you that the plate does stamp well, here again is the manicure I did with it (for full details, you can see my original post by clicking here). The stamp on my ring finger is from this plate, and you can see that it stamped crisp and beautiful:


It stamps well, and if you're a coffee lover, I think it's a must-have.

Tune in tomorrow when I'll show you a closer look at the XL version! :)

Hugs,
M.

Friday, December 5, 2014

Comparison and Before & After: Censored Coffee

(Nothing to disclose)

Hello!!

Wow, it has been forever and a day since I've been able to do a comparison post! But, I finally have one for you, born from the accidental purchase of two polishes that look suspiciously similar once I had them in my hot little hands.

So let's take a look at Color Club Lion's Den versus Orly Brush It On. Both are gold-rust-pink duochrome wonders made of teeny flecks...Here they are in the bottle:

Color Club Lion's Den vs. Orly Brush It On


As you can see, the Orly looks darker by far...but some interesting things happened when I started playing with then.

Here they both are with no undies; Orly Brush It On is on my ring finger and thumb, Color Club Lion's Den is on the rest; this is three coats of each polish:


Color Club Lion's Den vs. Orly Brush It On

Color Club Lion's Den vs. Orly Brush It On

Color Club Lion's Den vs. Orly Brush It On


I expected to have coverage issues with Lion's Den rather than Brush It On, but the opposite happened; in most lights I had almost no VNL with Lion's Den, but even with three coats, Brush it on wasn't opaque. Lion's Den has a thicker layer of flecks in the polish, and can conceivably be worn alone; I wouldn't really suggest you do that with Brush It On. Also, the color difference wasn't nearly as big as I thought, although Brush it on was slightly darker.

I don't like to use three coats of anything, so I decided to treat these like topper and see what they looked like over undies; I chose China Glaze Brownstone, a red leaning brown; this is one coat of each polish over one coat of undie:


Color Club Lion's Den vs. Orly Brush It On over China Glaze Brownstone

Color Club Lion's Den vs. Orly Brush It On over China Glaze Brownstone

Color Club Lion's Den vs. Orly Brush It On over China Glaze Brownstone

Color Club Lion's Den vs. Orly Brush It On over China Glaze Brownstone


Wow, wow, wow. In this case I like Brush It On a bit better--it looks like a gorgeous flakie topper that lets the base color shine through, and makes me deeply happy inside. Lion's Den is also beautiful, don't get me wrong; but it is thicker so you don't see as much of the base color. Either option is beautiful, but essentially Brush It On is more of a typical topper and Lion's Den adds more of itself to the dance.

I just bought some coffee-themed plates from MoYou London which I'll review for you tomorrow and the following day, but in the meantime I had to try them out. They're Cookbook Collection 03 and 04; I stamped using Konad White and Barielle Kiss Me Kate. I also did a dotticure on two fingers to go along with the background dots from the middle finger stamp. I seriously sliced my finger making dinner in between the painting and decorating, so I apologize for my censored pictures:


I chose Kiss Me Kate to stamp with because it's a beige with a hint of pink, and I thought that would go well with the colors underneath--I think it absolutely does, and it makes me wish I hadn't used white on the other two nails, lol.

So there you have it, a comparison of two beautiful fall polishes, along with a yummy coffee manicure. Now I think I have to go make myself a latte!

Hugs,
M.