Showing posts with label dry-brush technique. Show all posts

Thursday, September 7, 2017

UberChic Beauty Fairtytale 02 plate!

(Press samples and affiliate links ahead!)

Hello!


Ready for a trip into fantasy land? Today I'm going to show you UberChic Beauty's Fairtytale 02 plate, along with two manis and a tutorial...First up, here's the video review I did of the plate:


And here are the still shots:

UberChic Beauty's Fairtytale 02


What I love about this plate: There are two main themes here, Alice In Wonderland, and a royal princess sort of theme. I love the fleur de lis for Mardi Gras manis as well as fairytale manis, and same thing for the crowns. Anything to do with princesses, queens, etc., would be a great reason to use this plate. I love the layering dragon scales and the amazing butterfly, and the vintage clock is wonderful. And since Halloween is coming up, how cool would that creepy apple be...??


UberChic Beauty's full nail images are 17mm x 21mm, and here's a shot with a ruler so you can see how big the rest are:


The stamping quality of the plate is excellent:


...and these were done with a clear stamper. :)


Okay, on to the manis!


First, I wanted to capture the royalty feel...I started with Morgan Taylor Best Face Forward and No Filter Needed, then stamped the crown and fleur de lis images with Messy Mansion Soft Gold:


UberChic Beauty's Fairtytale 02 over Morgan Taylor No Filter Needed and Best Face Forward

UberChic Beauty's Fairtytale 02 over Morgan Taylor No Filter Needed and Best Face Forward


Next, I had to do something vintage with the sweet clock and tea cups on the plate. I started with a base of Girly Bits Cosmetics Yes, We Can and Irreplaceable. I did a dry-brush technique with Zoya Lois on some of the nails, then stamped my images with Girly Bits Irreplaceable and Hit The Bottle Polish My Suitor Wears Pewter (also available at Beautometry). Finally, I did a sharpie watercolor technique to fill in the teacups and pots:


UberChic Beauty's Fairtytale 02 over Girly Bits Cosmetics Yes, We Can and Irreplaceable

UberChic Beauty's Fairtytale 02 over Girly Bits Cosmetics Yes, We Can and Irreplaceable

UberChic Beauty's Fairtytale 02 over Girly Bits Cosmetics Yes, We Can and Irreplaceable


I did a tutorial video for this one, so if you want detail on how I did it, check it out:


You can find this plate and tons of others in UberChic Beauty's store, and you can follow UberChic around the web here:


Happy stamping!
M. xoxo

Wednesday, August 10, 2016

Review: Nail foil from Charlie's Nail art + MoYou London Steampunk 03 (or, foiled steampunk!)

(Press samples and affiliate links ahead!)

Hello!


So I was playing around with some nail foil that Charlie's Nail Art sent me for review, and when I saw what I came up with, I knew I just had to turn it into some steampunk nail art...but wait, I'm getting ahead of myself!


First things first. Take a look at this holographic silver foil from Charlie's Nail Art:


Holographic nail foil from Charlie's Nail Art


So, okay. I started with a base of Zoya Yuna, a dark gray with green-gold flecks:


Zoya Yuna
Zoya Yuna


 Now, you know you can cover your entire nail with nail foil, but I like to play around with it and use it in different ways. You can use it with stamping (see my post here), and I love to use it for background texture. Since I am currently obsessed with the dry-brush technique, I decided to see how it would look in combination with that.


I used Hit The Bottle Polish Everyday I'm Truffling (also at Beautometry) to add some golden-brown streaks, and some Messy Mansion Red-y Or Not (also on Amazon) on the accent nail. For the foil application, I used the dry-brush technique with my topcoat and pressed the foil on top of the polish right away, waited a few seconds, and lifted off. Here's how it came out:


Dry-brush + nail foil technique
Dry-brush + nail foil technique

Dry-brush + nail foil technique
Dry-brush + nail foil technique


I love that just the way it is--it's abstact and arty, makes me think of something you'd see in a museum. But my second thought was that it would be a perfect background for a steampunk mani! So I pulled out MoYou London Steampunk Collection 03 to stamp with.

I did a video of this plate you can see here:


And here's a closer look at the plate:


MoYou London Steampunk Collection 03

Clockfaces and geegaws and gears, oh my!


I stamped with Messy Mansion Soft Gold, and here's how it came out:


Dry-brush + nail foil technique + MoYou London Steampunk 03
Dry-brush + nail foil technique + MoYou London Steampunk 03

Dry-brush + nail foil technique + MoYou London Steampunk 03
Dry-brush + nail foil technique + MoYou London Steampunk 03


I love, love love love, love it. It's like some abstract bio-mech steampunk concoction filled with gears and awesome! I love how the depth and the holographic flash the nail oils add, like pieces of some precious metal suspended on my nails. :)


You can find the nail foil at Charlie's Nail Art, and you can use my code LOLAM10 for 10% off whatever you order.  You can also follow them on Instagram for tons of inspiration.


Happy foiling!
M.

Wednesday, July 27, 2016

Before & After: Coffee Klatch (Spellbound Nails Marauder's Map + UberChic Beauty Coffee Addict mini plate)

(Press samples and affiliate links ahead!)

Hello!


How's it going!? I got a little bit of good news today--it looks like at least most of my files are going to be recovered, so yay! ::happy file recovery dance:: So let's celebrate with another one of my favorite things: coffee.


For today's mani I started with a base of Spellbound Nails Marauder's Map, from Ashley's Harry Potter Book 3 collection:


Spellbound Nails Marauder's Map


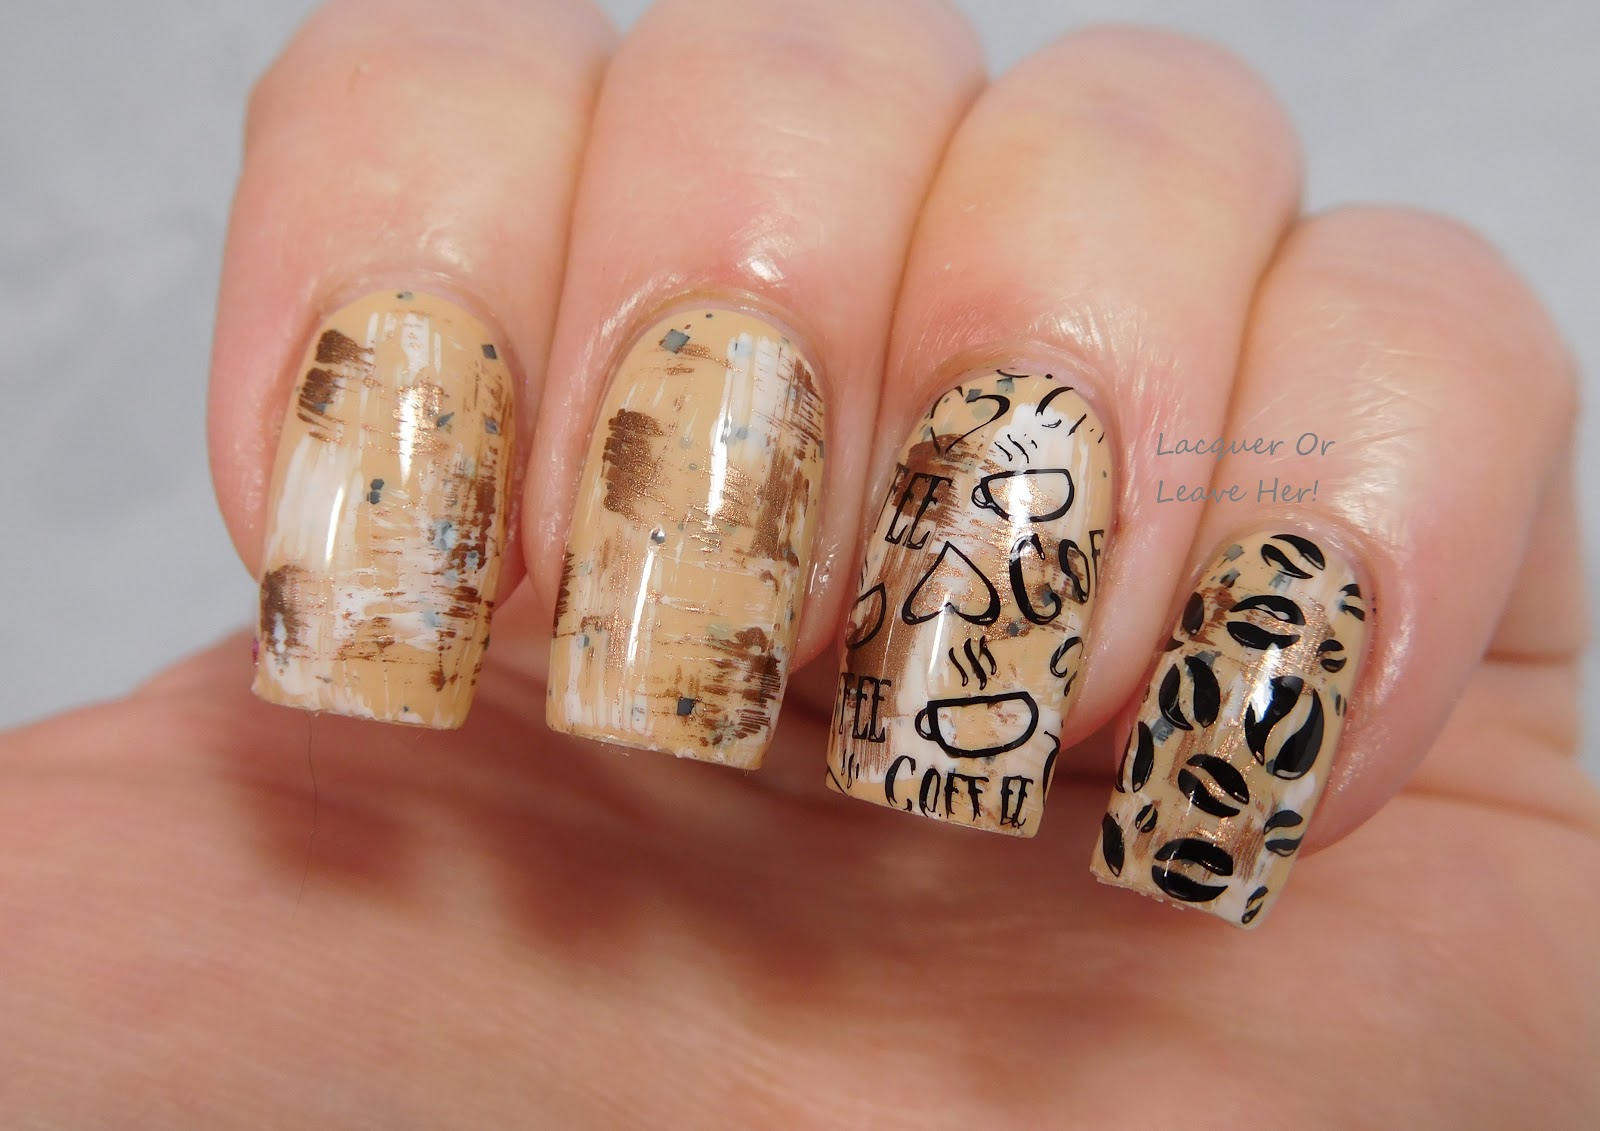
I've been really digging the dry-brush technique lately, so I decided to do that here. I used Spellbound Nails Milky Way and Hit The Bottle Polish Everyday I'm Truffling (you can also find HTB at Beautometry.com) to do a dry-brush cross-hatch pattern on the background, then I stamped my images from UberChic Beauty's Coffee Addict mini plate with Messy Mansion Carbon:


UberChic Beauty's Coffee Addict mini plate


Here's how it came out:


Spellbound Nails Marauder's Map + UberChic Beauty's Coffee Addict mini plate
Spellbound Nails Marauder's Map + UberChic Beauty's Coffee Addict mini plate

Spellbound Nails Marauder's Map + UberChic Beauty's Coffee Addict mini plate
Spellbound Nails Marauder's Map + UberChic Beauty's Coffee Addict mini plate

Spellbound Nails Marauder's Map + UberChic Beauty's Coffee Addict mini plate
Spellbound Nails Marauder's Map + UberChic Beauty's Coffee Addict mini plate

I love love love how this came out! The dry-brush technique is such an easy way to get good texture and dimension, and these colors are relaxing and chic. I love this almost as much as real coffee...sigh...:)


Happy stamping!
M.