Showing posts with label Foil. Show all posts

Friday, March 16, 2018

The Digit-al Dozen Does Stamping Day 5: Foil stamping!

(Press samples and affiliate links ahead!)

Hello!


Throughout the week we've moved through beginning to intermediate to advanced techniques, and today I'm going to finished with an advanced technique that I'm currently obsessed with--foil stamping!


In the immortal words of Kevin from Home Alone: "Don't get scared now..."


...Because this isn't really too much more difficult than regular stamping. Basically these are the steps:

1) Stamp as you normally would, using a foil-stamping polish. I'm using Moyras:


Moyra foil-stamping polish


2) Press your foil onto the image you just stamped. Remove foil gently.

3) Top with a water-based topcoat/basecoat. You can follow up with your normal topcoat if you like, but if you use it directly on the foil, because it will react and go completely bat-crap crazy and it will NOT look good.

That's it! You're done!


So here's the manicure I did, my very first attempt at foil stamping with this polish. I started with a base of Zoya Snow White, and stamped a poppy image from Dixie Plates Botanical 01. Then I stamped the dragonfly image from Dixie Plates Spring 01 with the Moyra foil stamping polish, and pressed my gold foil. I rubbed gently with a cuticle pusher, then pulled the foil off gently. Then I stamped the second layer of the dragonfly with Kaleidoscope st-01 Black. Then I topped off with UNT water-based basecoat. Here's how it turned out:


Foil stamping! Dixie Plates Botanicals 01 and Spring 01 over Zoya Snow White

Foil stamping! Dixie Plates Botanicals 01 and Spring 01 over Zoya Snow White

Foil stamping! Dixie Plates Botanicals 01 and Spring 01 over Zoya Snow White


I. Am. Obsessed. This turned out so amazing, and it was my very first try! I love, love, love this technique, and will use it a thousand more times.


I did learn a few things along the way though:

1) Not all foils are created equal. After I did this mani, I tried another mani with a different foil, one I got from a nail art store, that wasn't from Moyra. It didn't work nearly as well--the Moyra foils are thinner and adhere better. So, for best results, I'd stick with the foils meant to be used with foil stamping polishes.

2) The foils apply very well, but often won't cover perfectly. For best results, use the closest color stamping polish to the foil you're using, or to your base polish--for example, with this manicure, I used the silver polish and gold foil. If I'd used white or black, the areas that didn't cover perfectly would have shown up much more starkly. And, if I'd been using silver foil with the silver polish, the coverage would have looked perfect. If I were stamping red foil over a black base, I'd go with the black foil-stamping polish. Using the same/similar colors will save you tons of agony.


Here's a video tutorial showing how I made the manicure:


You can find the Moyra stamping polish & foil at Lantern & Wren (along with the stamping plates, and the Kaleidoscope polish). And I promise you, although this is a little more involved that regular stamping, the results are totally worth it!


I hope you've enjoyed my mini-journey from beginning to advanced stamping this week...and don't forget to check out the other ladies' manicures, linked below!


Big hugs,
M. xoxo

Follow me! 

Monday, February 19, 2018

Digit-al Dozen Mythical Creatures Day 1 (Or, how NOT to stamp on foils)

(Press samples ahead!)

Hello!


It's Digit-al Dozen time again, and I'm over-the-moon stoked about this theme: Mythical Creatures! I had so many ideas I wanted to do for this one, I had a hard time narrowing them down. I decided to start off with a no-brainer: Unicorns!


I figured this was a great time to do something I've wanted to play around with for a while--full nail foils. I chose a rainbow foil and cut it so there would be a vertical gradient on each nail. Then I stamped images from UberChic Beauty's Unicorn Love (click here for my review of the plate) over them:


UberChic Beauty Unicorn Love over nail foils
 

I stamped with Messy Mansion Carbon, Sterling, and Chalk, and filled in the unicorn hair and belly with Sally Hansen Heather Hustle, and the horns with Hit The Bottle Polish Holo There Beautiful.


Now, you probably know that when you use nail foils, you should use a water-based topcoat or base coat over them to preserve the foil--you can use your preferred topcoat on top of that for preservation, etc. You should also do this before you do any stamping onto the foils or try to put decals onto the foils. Here's what it looks like if you forget that step like I did:


Yeah. The color from the foil bleeds up into your stamping polish, and somehow manages to melt the polish, too. Now, if I'd just done that with the background stars, that might have been kinda cool--but what it did to the rest of the stamping most certainly was not. But that's okay--it allowed me to make some other improvements to the design when I redid it. :)


I also have to admit, using nail foils to cover your entire nail on every finger is a bit of a pain, especially when it comes time to remove--I don't think I'll do more than an accent nail again.


What do you think? Yay or nay on full-nail foils?


Thanks for stopping by, and don't forget to check out the other ladies' manicures, linked below! :)

M. xoxo


Monday, October 30, 2017

My Halloween Party Nails!

(Press samples and affiliate links ahead!)

Hello!


So last night I went to a Halloween party, and you know I had to do a special manicure to match my costume...I went as the ringleader of the undead:


If you look closely you can see that I have a skeleton cameo choker, and skeleton earrings hidden in my hair. So, for my manicure, I started with a base skittle of Zoya Sheri, Storm, and Troy. Then I stamped images from Born Pretty Store BP-57, Messy Mansion MM 58, MoYou London Gothic 01, and UberChic Beauty Texture-licious 03 (I stamped with Messy Mansion Sterling and Chalk, and with Zoya Sheri itself for the texture under the crazy beastie on my thumbs). I finished the look up with nail charms, and with nail skull nail foil from Born Pretty Store. I changed up the look slightly on each hand; here's how they come out:

Right hand:

BP-57, MM58, MoYou London Gothic 01 over Zoya Sheri and Storm

BP-57, MM58, MoYou London Gothic 01& UberChicBeauty Texture-licious 03 over Zoya Sheri, Storm and Troy

Left hand:

BP-57, MM58, MoYou London Gothic 01 over Zoya Sheri and Storm

BP-57, MM58, MoYou London Gothic 01& UberChicBeauty Texture-licious 03 over Zoya Sheri, Storm and Troy

 What do you think? Did I capture the spirit of the costume? Which hand do you like better?


Happy Halloween polishing!
M. xoxo


Wednesday, August 10, 2016

Review: Nail foil from Charlie's Nail art + MoYou London Steampunk 03 (or, foiled steampunk!)

(Press samples and affiliate links ahead!)

Hello!


So I was playing around with some nail foil that Charlie's Nail Art sent me for review, and when I saw what I came up with, I knew I just had to turn it into some steampunk nail art...but wait, I'm getting ahead of myself!


First things first. Take a look at this holographic silver foil from Charlie's Nail Art:


Holographic nail foil from Charlie's Nail Art


So, okay. I started with a base of Zoya Yuna, a dark gray with green-gold flecks:


Zoya Yuna
Zoya Yuna


 Now, you know you can cover your entire nail with nail foil, but I like to play around with it and use it in different ways. You can use it with stamping (see my post here), and I love to use it for background texture. Since I am currently obsessed with the dry-brush technique, I decided to see how it would look in combination with that.


I used Hit The Bottle Polish Everyday I'm Truffling (also at Beautometry) to add some golden-brown streaks, and some Messy Mansion Red-y Or Not (also on Amazon) on the accent nail. For the foil application, I used the dry-brush technique with my topcoat and pressed the foil on top of the polish right away, waited a few seconds, and lifted off. Here's how it came out:


Dry-brush + nail foil technique
Dry-brush + nail foil technique

Dry-brush + nail foil technique
Dry-brush + nail foil technique


I love that just the way it is--it's abstact and arty, makes me think of something you'd see in a museum. But my second thought was that it would be a perfect background for a steampunk mani! So I pulled out MoYou London Steampunk Collection 03 to stamp with.

I did a video of this plate you can see here:


And here's a closer look at the plate:


MoYou London Steampunk Collection 03

Clockfaces and geegaws and gears, oh my!


I stamped with Messy Mansion Soft Gold, and here's how it came out:


Dry-brush + nail foil technique + MoYou London Steampunk 03
Dry-brush + nail foil technique + MoYou London Steampunk 03

Dry-brush + nail foil technique + MoYou London Steampunk 03
Dry-brush + nail foil technique + MoYou London Steampunk 03


I love, love love love, love it. It's like some abstract bio-mech steampunk concoction filled with gears and awesome! I love how the depth and the holographic flash the nail oils add, like pieces of some precious metal suspended on my nails. :)


You can find the nail foil at Charlie's Nail Art, and you can use my code LOLAM10 for 10% off whatever you order.  You can also follow them on Instagram for tons of inspiration.


Happy foiling!
M.

Sunday, January 4, 2015

Review and NOTD: MoYou London Kaleidoscope 04

(Nothing to disclose)

Hello!

Today I have a quick review for you of MoYou London's Kaleidoscope 04, along with a semi-fail but still happy manicure for today's 'happiness' theme in my Crumpet's Nail Tarts' 31 Day challenge. This is the second plate from the Kaleidoscope collection I'm reviewing; I also showed you Kaleidoscope 06 a while back, so take a look at that for a different idea on how to use these plates.  :)

Here's the video review portion:


And here are the still images of the plates:


MoYou London Kaleidoscope 04


MoYou London Kaleidoscope 04

MoYou London Kaleidoscope 04

And here is a comparison with a standard Konad plate so you can get a feel for how large the designs are:


I did a mani to both test out this plate, and to play around with the stamping + nail foil technique I told you about a while back, to see how much coverage I could get with the technique. I started with Orly Ablaze, and then stamped over it using Barry M Gold Foil on all nail except the accent nails; on those I used Sally Hansen Mint Sprint:


Let the sun shine in


I think this is a great sunshine sort of look, it could even be stars at Christmas time. So just because the plate says Kaleidoscope, don't let that limit you! Also, when I first looked at this image on the plate, this center 'star' design didn't pop out at me as much, because it's hard to remember which parts of the design are going to show and which aren't. So I would recommend doing a quick stamp with each image on a sheet of paper or some such, so you can see the full potential of each image. :)

This was a test mani in the truest sense--I was playing around with techniques and colors and plates, and didn't intend for it to be put up on the blog, originally. So the stamping isn't perfect, and neither is the foil transfer. But, it's such a bright, happy, fun manicure, I thought it would be perfect for the theme of 'happiness', particularly in the middle of winter, so I decided to go ahead and post it, despite the flaws. I hope it brings you a ray of January joy!

Hugs,
M.

Thursday, October 9, 2014

Before & After: Sparkly Spiders

(Nothing To Disclose)

Hello!

Okay, so, some of you got an accidental sneak peek of this manicure because I hit the wrong button when I scheduled it...it's been a while since I've done that, but I had hoped to never do it again...so I'm gonna spin it like it was a VIP thing if you got to see it. ;-)

My base color today is the third and final polish I have (so far) from the awesome Blink Of An Eye collection, which is a set of saturated matte polishes that have crazy dimension and an awesome waxy finish. If you missed the other two, you can see Misa Eye Candy here, and Misa Lash Out here.

But for now, let's take a look at High Brow, a vampy aubergine with hints of fuschia flecks:

Misa High Brow
Misa High Brow

Misa High Brow
Misa High Brow

Misa High Brow
Misa High Brow

Misa High Brow
Misa High Brow

Misa High Brow
Misa High Brow

I decided this would be the perfect night-time Halloween sky type of base polish; so I used it as a the background for a spooky-licious spider-cure:


To make this, I stamped the web using Bundle Monster H07 (you can find my review of this set here) and Barry M Silver Foil, and the spider with Bunny Nails HD-D (you can find my review of this set here) and Sally Hansen Lickety-Split like and Pronto Purple. I used the stamping+foil technique on all the stamping--silver over the silver, purple over the purple, and green kaleidoscope holo over the green. :) If you missed my tutorial for the stamping+foil technique, you can find it by clicking here.

And, for reasons I'll never understand, while I was making the manicure, my head put together a poem about it, so I thought I'd share it with you:

In darkest night
The spiders crawl
Cross silver'd web
Come one, come all
Along your ear
Across your face
Sleep well, my dear
They'll leave no trace...

Nighty-night,
M. :)

Saturday, October 4, 2014

Tutorial: stamping with nail foils

(Nothing to disclose)

Hello!!

A few days ago,  I showed you this manicure using a technique I'd recently heard about, that adds nail foil on to stamped designs. I had some interest in the technique, so I have put together a tutorial for you on it.

First let me be clear, though--this was totally not my idea, it's just a technique I tried out. Here is the video, which I saw in The Joy Of Nail Stamping group I'm in. She shows how to do it on nail decals, which I'm excited to try but haven't done yet. But I have played around a bit now with the technique on my nails and have a few tips and tricks to share with you. :)

For today's design and tutorial I started with LynBDesigns Spot The Cuttlefish, a delightfully unique fall polish that I've fallen in love with. It's a caramel brown jelly with gold and brown flakies (flakies!!!) and a scatter of holo:


LynBDesigns Spot The Cuttlefish

LynBDesigns Spot The Cuttlefish

LynBDesigns Spot The Cuttlefish

LynBDesigns Spot The Cuttlefish

This polish is like walking in a fall wonderland...it's the epitome of the season to me. This is three coats and I wish it covered like this in two coats--but seriously, I'll get over it, it's just so gorgeous.

So let me show you the end result of my design first, and then I'll show you the tutorial on how to do it...I was inspired by the fall feel of the polish to do a fall leaf design, using the stamping + nail foil technique:


Fall foil leaves
Fall foil leaves

Fall foil leaves
Fall foil leaves

Direct light to show the foil close-up before topcoat:


And after topcoat:


I stamped the leaves using Anna's Nail Art plate W231; I stamped with Barry M Gold Foil for my stamping polish, and then used three different foils on top, a green foil, a gold foil, and a duochrome-y foil that goes from purple to gold (that one is on the pinky and the index finger).


Okay, so...how do you make this happen? Let's take a look:

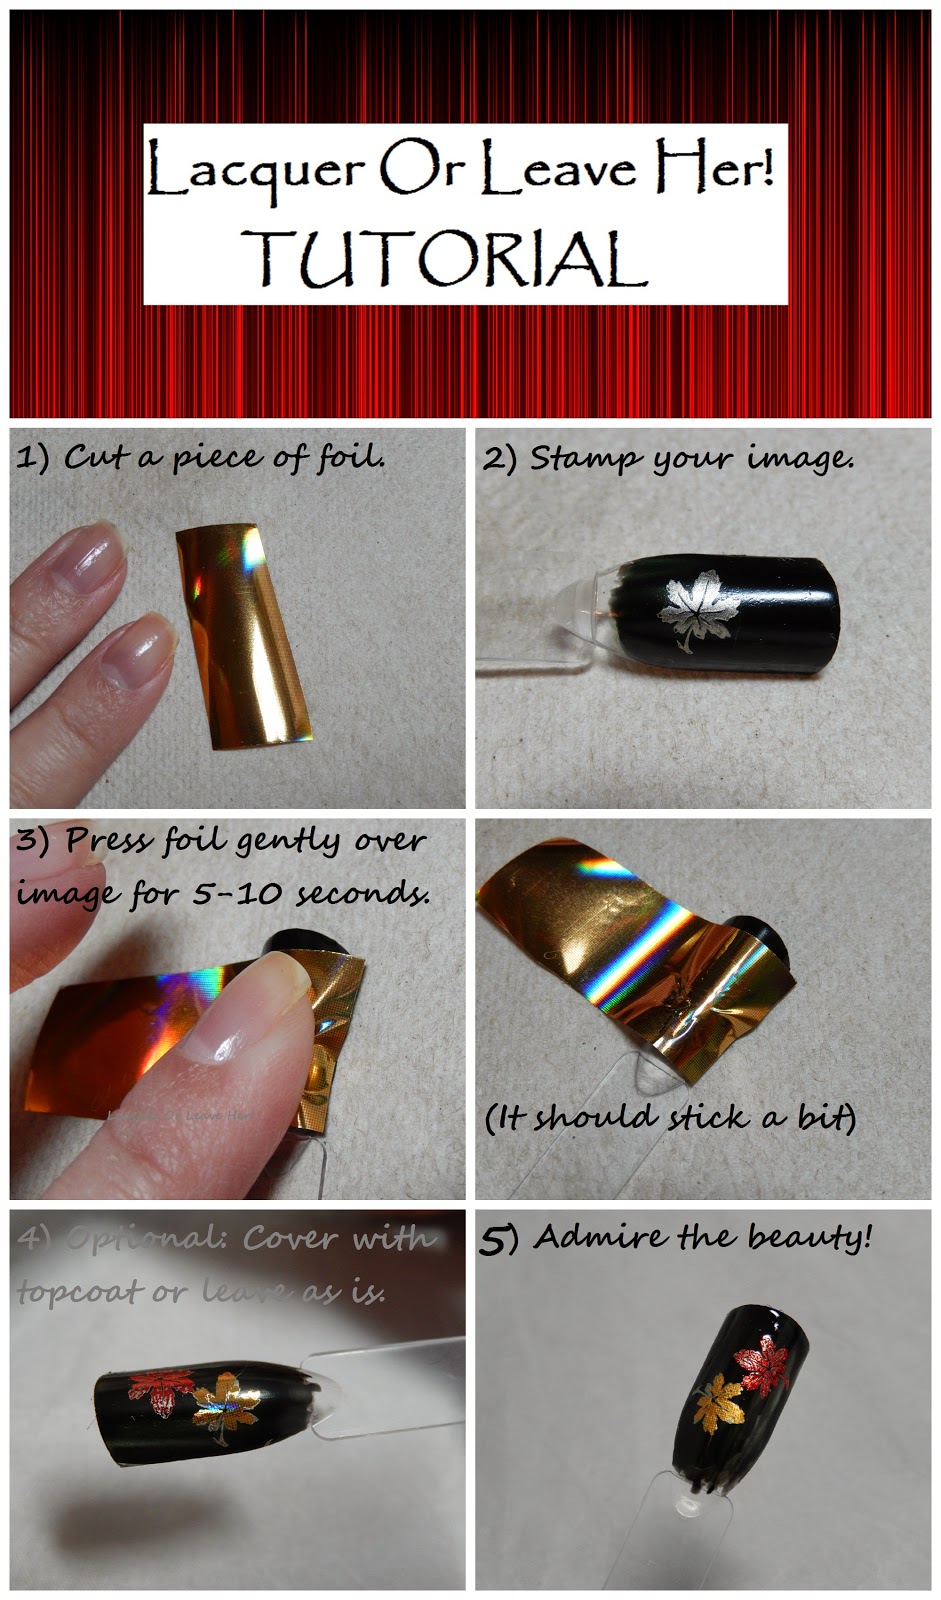
1) First you're gonna need some foil. You can get these on most nail art supply sites; I got mine at Born Pretty Store (and I paid for them with my own money, not sent for review). The most often come in little bottles like this, rolled up inside:


Gold nail art foil

Cut off a piece that you can work with, at least a little bit larger than your design. The foils are inexpensive for the amount you get, so I lop off a fairly big piece that's easy to work with:


Cut off a piece of that foil!! And ignore those nekkid nails!

2) Stamp your image.

Stamp your image.

There are two important things I learned about this step. The first is, you want your base polish to be completely, 100% dry. Not tacky at all, otherwise your foil will stick to the entire nail. Which is a cool look, but not the one you're going for here.

The other issue is the stamping polish you choose. It's very likely that not all of your design will be perfectly covered; if you look at my manicure above, you can see spots where the foil didn't transfer. That can be a good thing or a bad thing depending on what you're doing for; for fall leaves, I wanted to get a variegated look and didn't mind that at all. But if you want to try to get a uniform look, it's best to choose a base color that's fairly similar in color to the foil that you're using. I'll show you what I mean below.


3) Apply your nail foil on top of the stamped image.

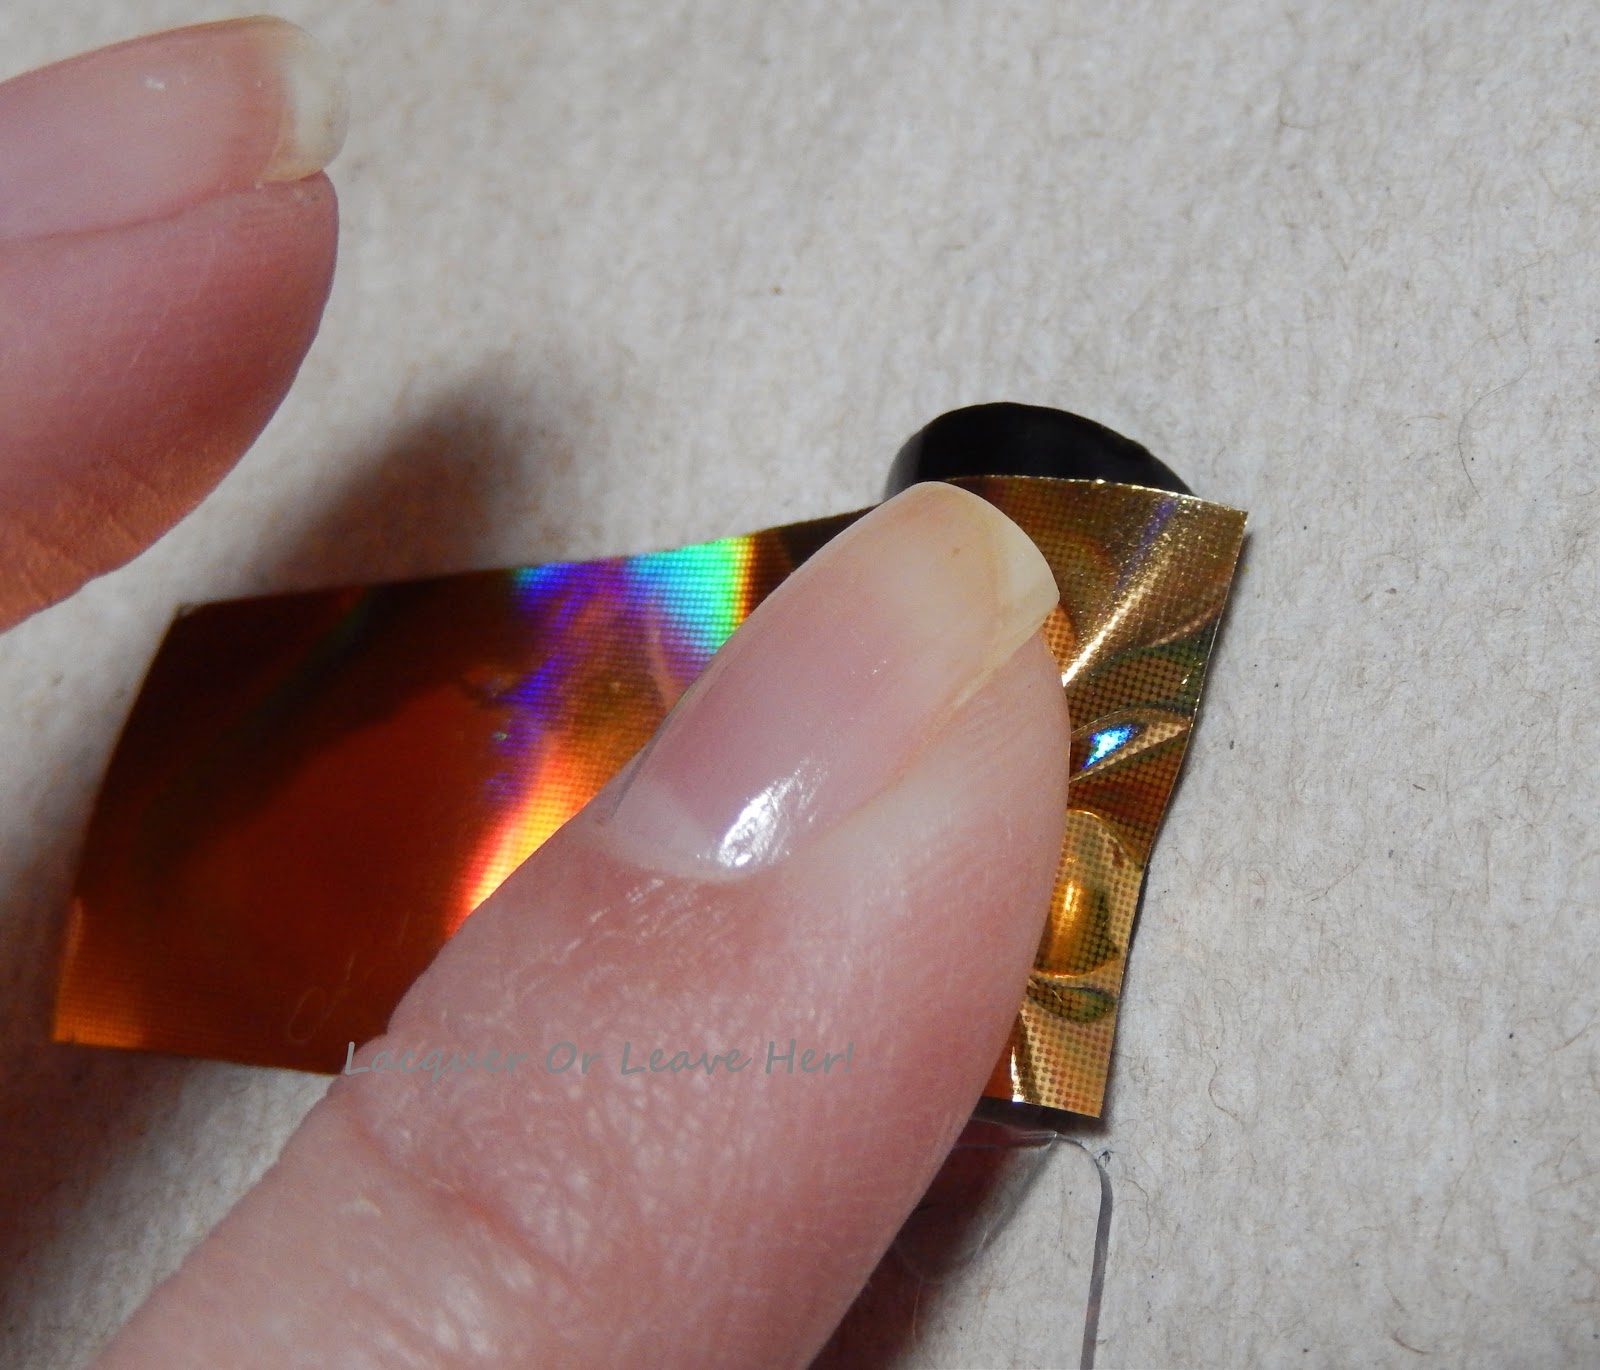
You're going to want to do this fairly quickly after you've stamped your image, otherwise the polish will dry and the foil won't stick well. Don't freak out, you have a few seconds, but don't push it either. lol. And I've found that it's best to use gentle even pressure over the image, and to hold the foil in place for about 5-10 seconds.


Hold foil on top of your image for 5-10 seconds.

When you lift your finger, your foil should be stuck to the image like this:


Then just lift it off. :)


Notice how there are small bits missing from both images, but in the case of the gold foil, it's not nearly as noticeable. So it depends on the look you're going for whether you should match your stamping polish to your foil.


4) Decide if you want to use topcoat or not.

It's not a secret that most topcoats cause nail foil to crinkle and dull somewhat. This is a major problem if you have an entire nail covered in foil and are going for a shiny mirror sort of look. There are some topcoats out there that leave foil intact, and you can certainly invest in one of those for this purpose. You can also choose not to use topcoat, but I wouldn't advise it if you want your look to last for more than an evening--the foil will rub off.

In my opinion, while the topcoat does make a difference, it's not a big enough one to worry about. Take a look at these pictures of the design with topcoat, and compare them to the pictures above. Do the same with my full manicure above; I took before and after pictures there as well.  Yes, there is a difference, but how noticeable is the difference, really, especially when you're looking at an actual nail and not a huge close-up picture? The answer is, not much:


But, it's completely up to you! And whatever choice you make, remember to:

6) Step back and enjoy your design!


Here it is put into a single image for ease of pinning:


I hope you've found this helpful, and I encourage you to try this technique. It's stunning!

Hugs,
M.